
When we first bought our house over two years ago, the laundry room looked like this...

It had some really gross mismatched laminate tiles for flooring...

The washer hookup was on one side of the room and the dryer vent was on the other side of the room... in a panel of the sealed back door.

And the walls were stylishly wallpapered.

One of our first big home improvement projects was to rip down all of the wallpaper and lay new tiles. It made for a huge difference in the laundry room.

We relocated the dryer vent and stacked our brand new washer and dryer. Unfortunately, there wasn't anything else in the room. No cabinets. No shelving. No countertops. So, more often than not, the room would end up looking like this:

I eventually moved an old particle board tv cabinet in there so that I had some shelving for organization, but it was still haphazard at best.
Recently, when I raided my Dad's house for free stuff, I acquired a pair of base cabinets. For FREE!

The cabinets were being used in their garage for storage. They were originally my parents kitchen cabinets prior to their big kitchen renovation. Since there was a whole kitchen's worth of cabinets in the garage and all of them were free standing, I decided to swipe a pair for the laundry room.

The cabinets were somewhat banged up, but it was nothing a little primer and paint couldn't take care of.

I highly recommend using rollers when painting furniture with lots of flat surfaces. It's so much quicker than using a brush.
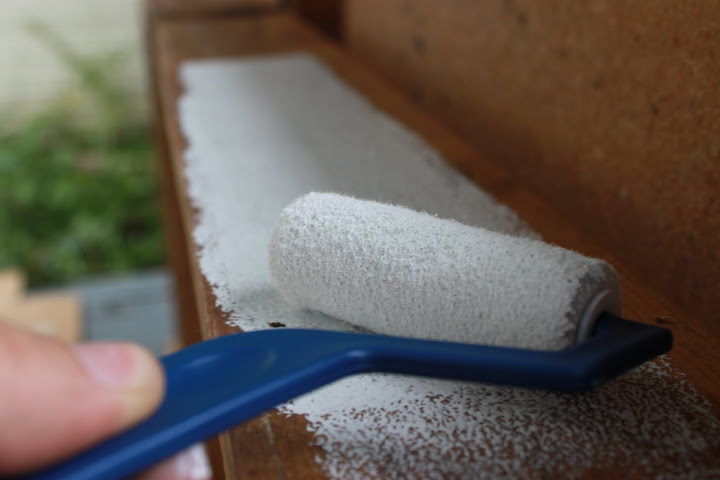
I painted the fronts and the insides with several coats of paint.

I tried to pry off the big rectangles in the middle of the cabinet doors, but ultimately decided I was in danger of busting a hole right through the door.

Eh. I can work with it.

Stephen unstacked the washer and dryer for me. I do most of the laundry and the dryer was a bit too high up for my short self. Besides, I think this arrangement is more suited to the space.

I am thoroughly enjoying the washer and dryer in all of it's unstacked glory.

I have to decide whether I'm going to go with cabinets or shelves in the corner above the base cabinets. If I do go with shelves, they'll probably look something like this:

And maybe I'll eventually throw in some bead board or board and batten. Who knows.
The corner closest to the washer is a bit awkward as a result of an old chimney, but there are hookups for water over there, so we may eventually put a utility sink in that corner.

The laundry room door floats about 2 feet off the ground outside. There's no stairs or porch on the other side. It leads to the back yard, but it's been sealed shut by spray in insulation since before we moved in. It's in desperate need of a paint job and, seeing as it has a big hole in it, it really needs to be replaced at some point. That's not likely to happen anytime soon, so I'm probably just going to paint it a blinding white for now.

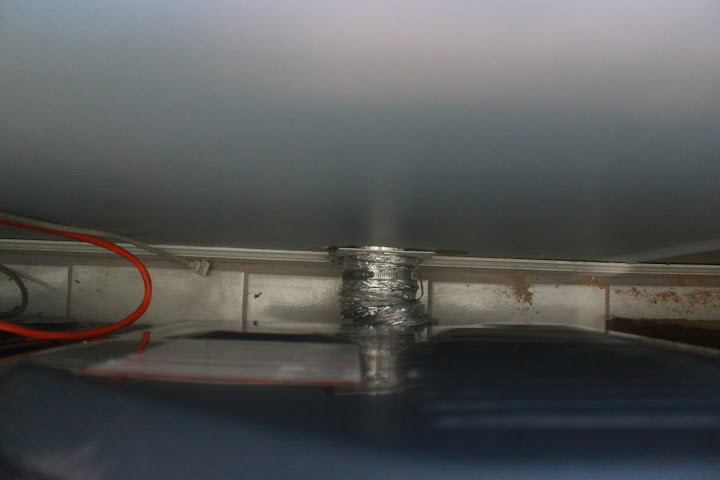
The dryer vent used to be located IN the lower panel of the back door, but when we first bought our washer and dryer and stacked them together, we moved the location of the dryer vent.

At the time, we were thinking that we'd build shelves between the washer/dryer and the wall and that you'd never see the vent. Then we decided to unstack the washer/dryer and come up with a new layout...

So, now the vent is directly behind the dryer. Yes. We have three possible dryer vent locations. Don't judge.
From all the slamming, stomping, and swearing, I gather that installing the newest dryer vent wasn't the most pleasant task, but I really, really appreciate it Stephen! Thank you.
In addition to all the other fabulousness going on in the laundry room, we have this:

Stephen redid all the plumbing with Pex lines (which are AH-mazing) and he wanted to have easy access to turn water on and off from inside the house. We have a cellar, not a basement and you have to go outside to get to it. So... he may have cut a hole in my laundry room wall. I've been thinking of how best to fix this and I think I've settled on one of these:

I think I can build a drying rack that either hangs or opens up on hinges to reveal the water access. Like a bookcase to a hidden passage... only less cool.
As for counter tops, my sister in law Sarah suggested concrete. I think she's brilliant!
Countertops can be expensive, but a bag of concrete costs about $5. Build a mold, maybe add a grate for reinforcement, pour the concrete, allow it to set, then polyurethane that sucker and you have a pretty cheap diy countertop solution. From what I've read on other blogs, it's fairly easy. Besides, YouTube makes me think I can do it.

It would look great with our washer & dryer! See?

What do you think?
And if we ever get around to decorating the room, here's my laundry room moodboard from when we first bought the house.

Though, I have to say... I'm really starting to lean towards watering cans...

Lots of watering cans.
I really want you to do concrete countertops. And not only because I want to do them someday.
ReplyDeleteOkay, maybe that is the reason. This is going to be a really useful space.
Do a search on the internet for kitchen countertops you ought to get numerous hits. Then take a look at the solutions and see which site offers the most beneficial price on the counter leading you might be seeking.
ReplyDeleteEEE!! concrete countertops!!! It would be SO COOL!!! And cheap! And would look so good! :) :)
ReplyDelete*whispers* Sometimes I think you can do magic..
ReplyDelete