
I found a free apron pattern & tutorial at this site.
And quite frankly, the apron was too cute for me to pass it up. The wide waistband, the fluffiness, the scalloped edging! Clearly, Sarah's 50s dress needed this matching apron, so it was the perfect excuse to get crafty!
You have to print the pattern out on 15 different pages.
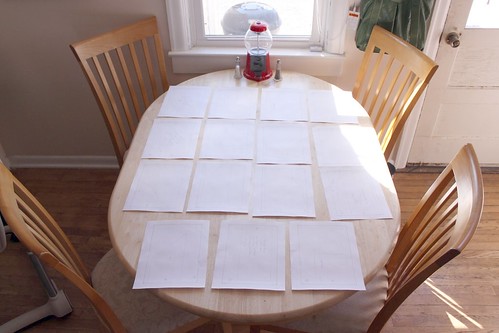
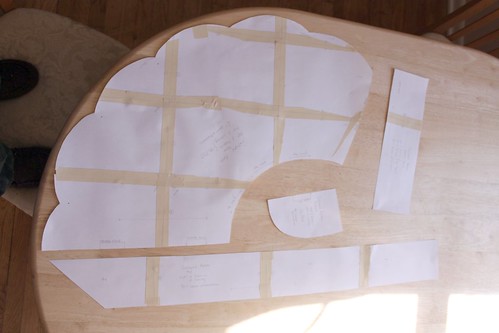
Trim the edges, match up the letters on each side, tape them together, and cut the pattern out. It's genius! The pattern pieces even have directions already written on them.
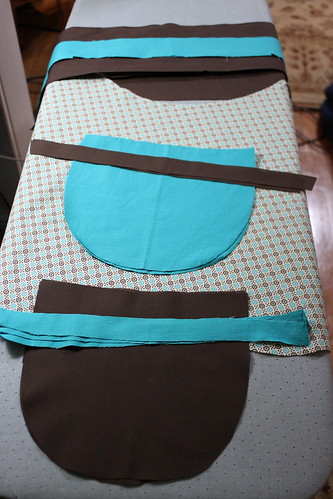
Here are my fabric choices. There's the turquoise that I used for Sarah's dress, a plain chocolate brown, and this sweet patterned fabric to tie it all together.

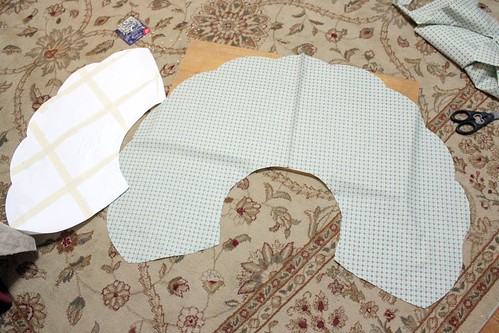
Follow the directions on the pattern pieces to cut out your fabric.
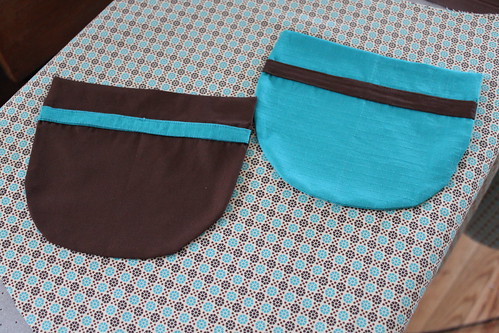
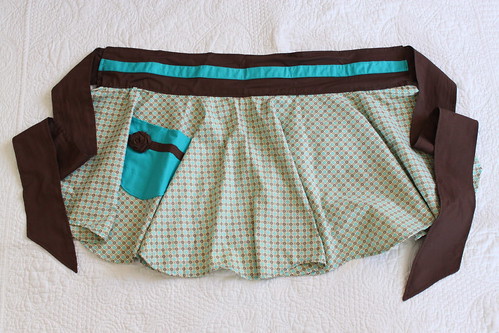
Since this is a reversible apron, decide how you want to alternate your fabric on either side. I decided to have the waistband and skirt portions the same, but to have different colored pockets.
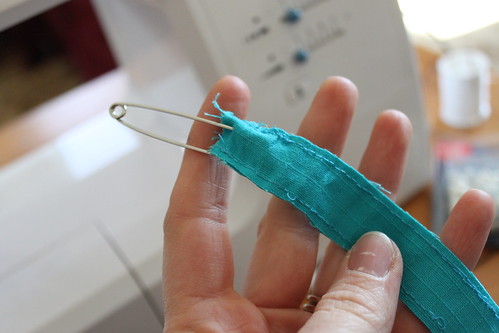
I also decided to embellish the waistband and pockets with a single stripe. So, I placed two strips of fabric together, sewed a line down either side, turned it inside out, and then ironed it flat. The easiest way to turn a long, narrow piece of fabric inside out is to safety pin the end and then feed the safety pin through to the other side.
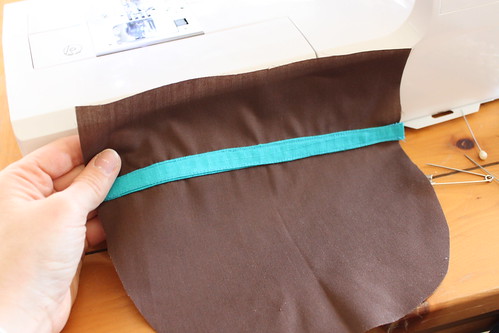
Sew you ironed stripe onto the right side of your pocket piece.
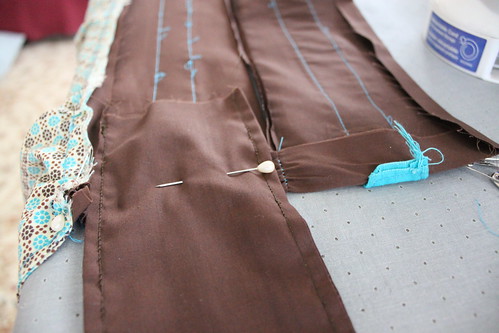
Then sew the two matching pocket pieces (right sides together) using a 3/8 inch seam allowance. But remember to leave a gap so that you can turn the pocket inside out. The tutorial says to leave the hole in the top straight away part of the pocket (which is what I did), but then you have to hand sew it shut. If you leave the gap in any other part of the pocket, it will get sewn over by the machine when you sew the pocket onto the skirt.

Trim the edges of the pocket, cut triangles out around the curved parts (be careful not to cut the sewn part), and then turn your pocket inside out.
Iron it flat. I find that it is helpful to use a pin to pull out the corners and curves as you iron. Repeat the process with the second pocket.
Then determine where you want the pockets to be on each piece of your skirt & sew them in place. Be careful not to sew the top of the pocket closed. I did that without thinking the first time & had to rip out the stitches.
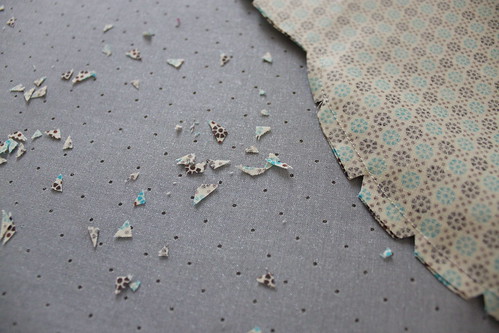
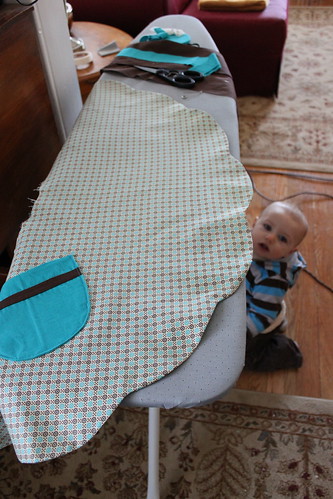
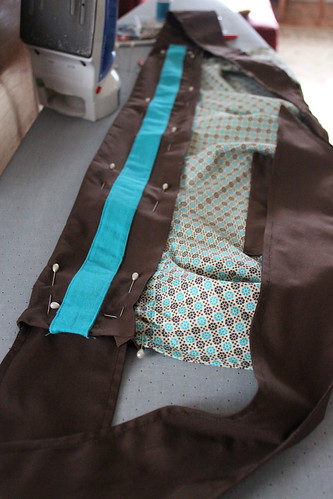
Next, pin the two skirt pieces right sides together and sew around the edges with a 3/8 inch seam allowance. Do not sew the waistband together. Trim the edges around your sewing and cut triangles out on all of the scalloped curves. Again, be careful not to cut through the thread.
Turn your skirt piece right side out and iron all of the edges flat. It will take a while. Once you have your ironed skirt, baste two lines of thread along the waist area and gather it a little. You want the the waist of the skirt to be slightly shorter than the waistband.
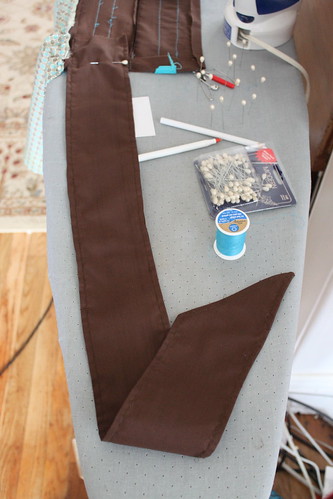
Next, I sewed the stripes onto the individual waistband pieces. Then I placed the two waistband pieces right sides together and sewed a line down one side. With that done, I opened up the waistband and pinned/sewed one side to the gathered skirt.Then I pressed all of the edges of the waistband inward to prep them for later sewing.
Finally, sew turn & press the apron ties.
Then attach them to the open waistband like so:
We're going to fold the waistband into place and pin it over the end of both ties. Then we are going to sew a straight stitch all the way around the edges of the waistband.
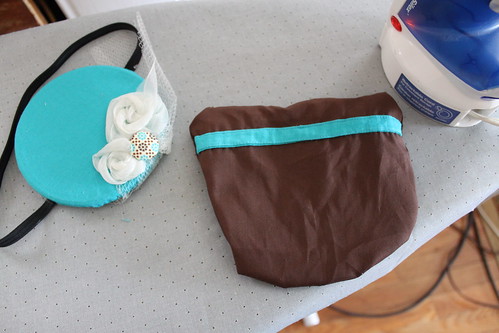
All done! I decided to make little roses from scrap pieces of fabric to embellish the pockets...
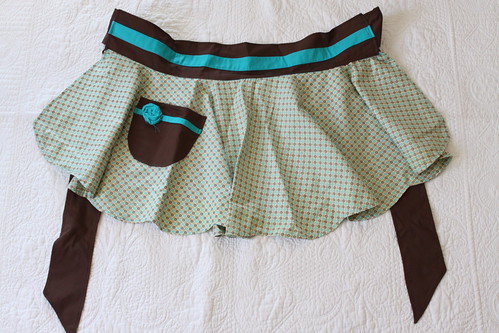
Because, let's face it, the pockets needed those little flowers!! They told me so. There may have been crying, sniveling, and pleading. Being the magnanimous person that I am, I relented and granted their wish.
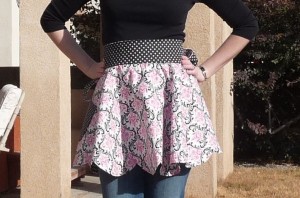
Again, I'll let Sarah do the modeling if she wants to. She's the one with the matching dress.

And I was wearing my pjs when I finished this thing. With bed head. While I'm sure this apron would make just about anything cute, I have to draw the line somewhere.
So, what do you think? Are you game to try it?
You love me WAY too much, you know?
ReplyDeleteI LOVE LOVE LOVE that apron!!! And this weekend I promise to take pictures of the whole ensemble! :)
Wow! This looks tough, but so cute. I can't wait to see it on her with the dress.
ReplyDelete