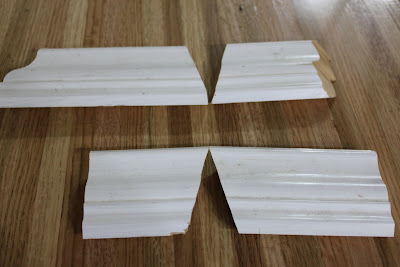
 Back when we first installed the cabinets, I stained some crown molding with the intention of using it to finish the cabinets. Naturally, that means that the molding sat around collecting dust for several months.
Taking on the installation of crown molding is actually terrifying. It's so easy to screw it up! For the cabinets, I was going to need 90 degree outside corners and 135 degree inside and outside corners. In my head, that means you divide the angle in half and cut the molding at 45 degrees for the 90 degree corner. BUT IT DOESN'T WORK THAT WAY!! ARGH.
Since the molding sits at an angle, it's much more complicated than you think it will be. To keep myself sane and avoid wasting a ton of expensive molding, I used some scrap molding and made some labeled templates.
90 degree inside & outside corner templates:135 degree inside & outside corner templates:I carefully measured all of the pieces I would need for the cabinets.

I used my handy dandy compound angle miter saw (bought on super sale on Black Friday!). It gives you both a miter and a bevel angle, so you don't have to hand shave the inside corners. Thank goodness. You can also cut the crown while it is lying flat, which is a HUGE help!
 I followed this chart in the instruction manual as closely as I could. Every time I set up a cut, I double (triple/quadruple) checked it to make sure it was what I needed. I checked the cuts against my templates.
 This chart and the saw give you the angles for the miter and the bevel for a 90 degree angle. I had to look up the appropriate cuts for the 135 degree angles. This chart was very helpful.
To conserve the molding and ensure that I didn't run short, I tried to use both sides of each and every cut whenever I could.
I laid the crown out on the counters under each of the cabinets as I cut them. That way, I was able to keep track of which piece went where. I cut a lot of the pieces just slightly longer than they needed to be so that I wouldn't accidentally come up short. You can always trim a little off, but you can't make the pieces longer after the fact. I only cut one piece at the wrong angle early on and was able to salvage it by using it in a place where I needed a shorter piece.
 Stephen & I used the nail gun & air compressor (thanks Grandmom & Pop!) to put the molding up.
 Match up the corners, then nail the piece in place.
  Bar area before:
 Bar area after:

 Before:
 After:
 Before:
 After:
 Before:
 After:
 Overall after:


I can't believe what a difference that makes!! It's beautiful!!
ReplyDeleteNice work.
ReplyDeleteNow to the splash guards...
...and the kick boards... and the sink surround... and the rest of the counter top in the corner... and eventually the counters and cabinets will actually have to be mounted in place... And eventually there might be an island...
ReplyDeleteIt's a work in progress.
Thanks, Sarah!
ReplyDelete