Showing posts with label Sewing. Show all posts

Friday, March 11, 2011

Adventures in Millinery: The Pillbox Hat

Now that we've made a fascinator hat and an apron, let's make a pillbox hat!

As I have NO IDEA WHAT I'M DOING and have never made a hat in my life... I found this very helpful video tutorial on youtube:


Isn't she great? Applause!

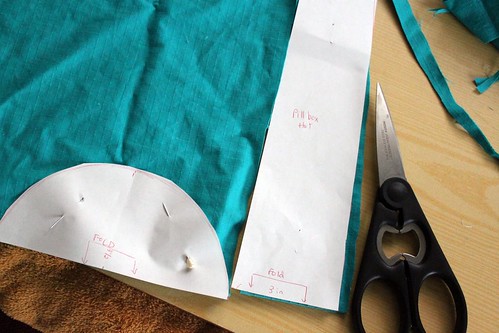
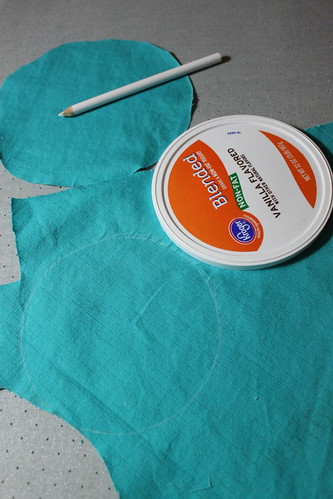
So, let's get started by cutting out our fabric with our homemade pattern... I really like finding free patterns or directions for patterns online. It's one of those little things that makes me happy.


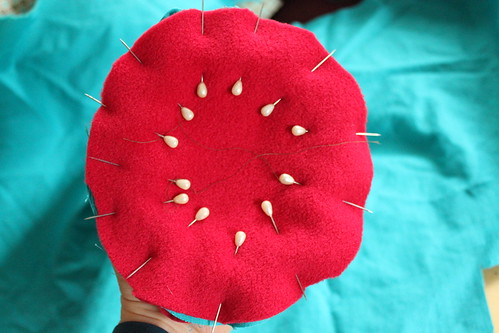
Humble Bumblebee used a heavy weight fabric, but I wanted to use the same lighter weight fabric that was in the dress, so I also cut out some heavy weight fleece with the same pattern to line the hat with and make it hold it's shape better.


And from that point on I had some difficulties due to the added lining and a few stupid mistakes on my part... So I got a bit focused and frustrated... and forgot to take any more pictures... Fortunately, Humble Bumblebee has got my back and you can follow her superb instructions. I want to try this project again soon with a more appropriate fabric.

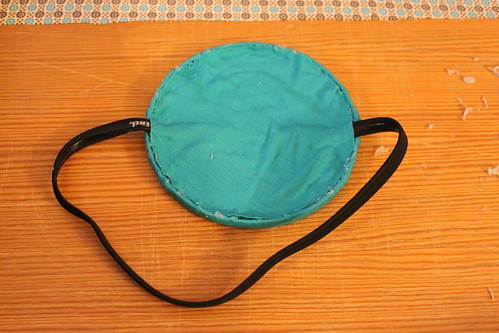
Due to my fabric choices, I still didn't think the hat would hold it's shape as well as I wanted it to, so I hot glued & sewed another yogurt lid into the inside top of the hat. It made the form more rigid and had the added bonus of tricking Sarah into wearing another yogurt lid on her head. Bwahahaha. Evil Sister-In-Law strikes again.

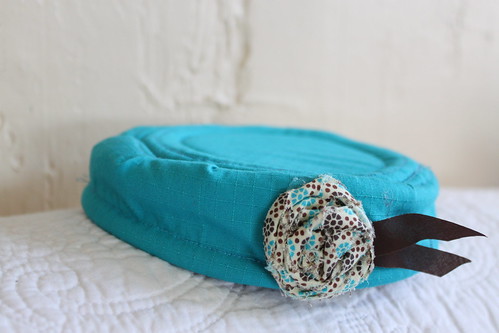
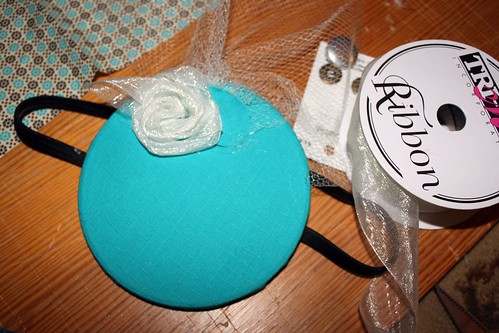
Anyways, this is how it turned out.


I made another fabric rose and hot glued it into place... but it seemed lonely, so I gave it two little brown tails. I think they make the hat. Overall it turned out well, but I still want to try again with a thicker felted material some time.

Next, though, I think I want to attempt a newsboy cap for Joseph. I have this idea for a one year photoshoot stuck in my head.


I've got some green tweed that should work nicely... I'll let you know how it goes...

Wednesday, March 9, 2011

Reversible Retro Scalloped Apron Tutorial

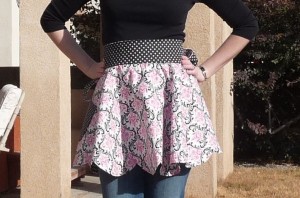
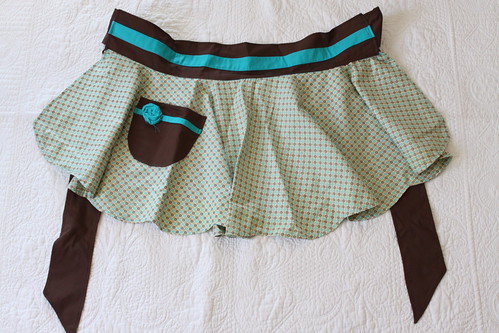
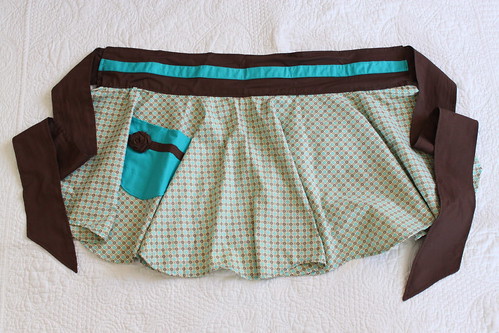
In addition to making hats for Sarah's birthday, I also made the most adorable retro reversible scalloped apron.

I found a free apron pattern & tutorial at this site.


And quite frankly, the apron was too cute for me to pass it up. The wide waistband, the fluffiness, the scalloped edging! Clearly, Sarah's 50s dress needed this matching apron, so it was the perfect excuse to get crafty!

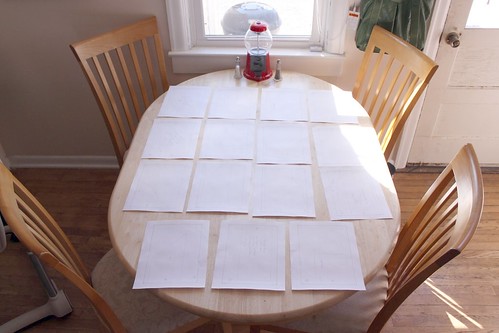
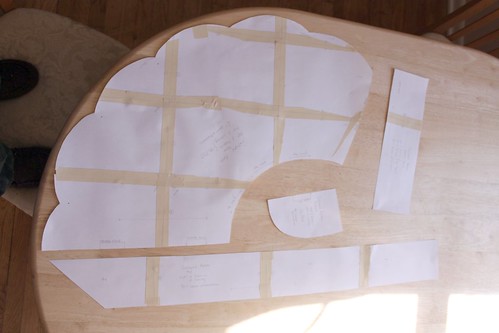
You have to print the pattern out on 15 different pages.


Trim the edges, match up the letters on each side, tape them together, and cut the pattern out. It's genius! The pattern pieces even have directions already written on them.


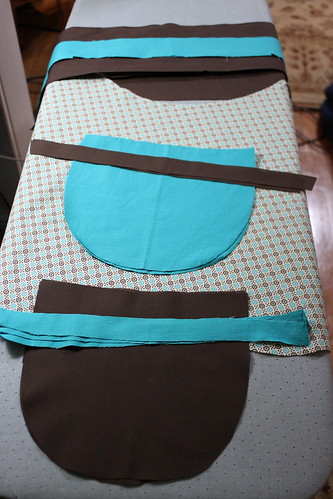
Here are my fabric choices. There's the turquoise that I used for Sarah's dress, a plain chocolate brown, and this sweet patterned fabric to tie it all together.


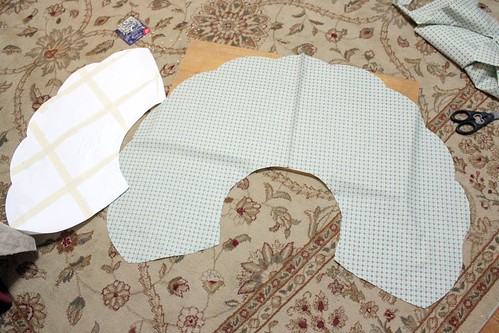
Follow the directions on the pattern pieces to cut out your fabric.


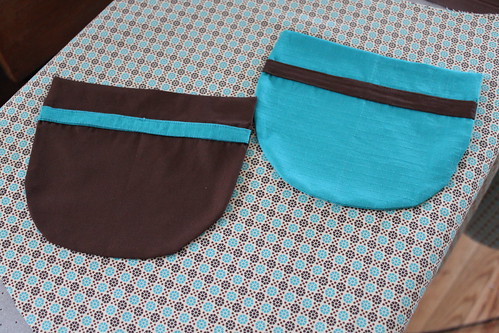
Since this is a reversible apron, decide how you want to alternate your fabric on either side. I decided to have the waistband and skirt portions the same, but to have different colored pockets.


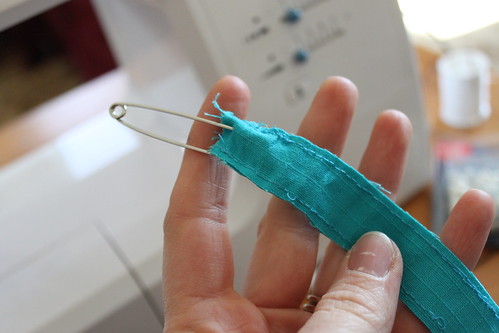
I also decided to embellish the waistband and pockets with a single stripe. So, I placed two strips of fabric together, sewed a line down either side, turned it inside out, and then ironed it flat. The easiest way to turn a long, narrow piece of fabric inside out is to safety pin the end and then feed the safety pin through to the other side.


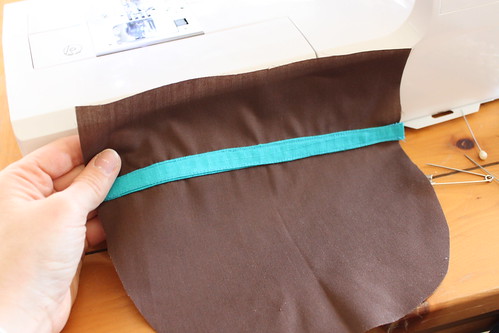
Sew you ironed stripe onto the right side of your pocket piece.


Then sew the two matching pocket pieces (right sides together) using a 3/8 inch seam allowance. But remember to leave a gap so that you can turn the pocket inside out. The tutorial says to leave the hole in the top straight away part of the pocket (which is what I did), but then you have to hand sew it shut. If you leave the gap in any other part of the pocket, it will get sewn over by the machine when you sew the pocket onto the skirt.


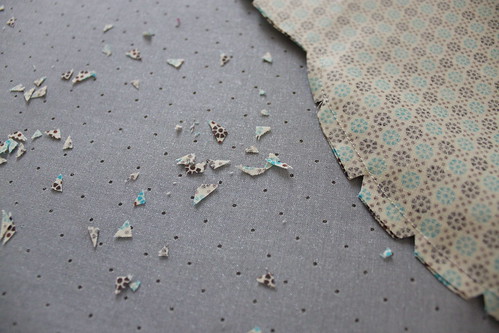
Trim the edges of the pocket, cut triangles out around the curved parts (be careful not to cut the sewn part), and then turn your pocket inside out.


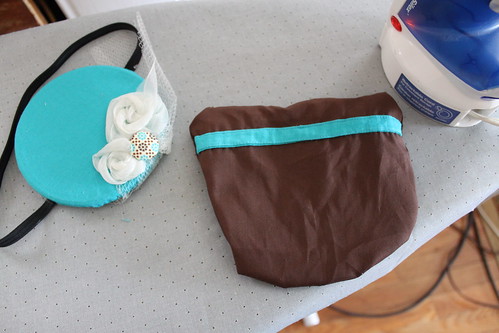
Iron it flat. I find that it is helpful to use a pin to pull out the corners and curves as you iron. Repeat the process with the second pocket.


Then determine where you want the pockets to be on each piece of your skirt & sew them in place. Be careful not to sew the top of the pocket closed. I did that without thinking the first time & had to rip out the stitches.

Next, pin the two skirt pieces right sides together and sew around the edges with a 3/8 inch seam allowance. Do not sew the waistband together. Trim the edges around your sewing and cut triangles out on all of the scalloped curves. Again, be careful not to cut through the thread.


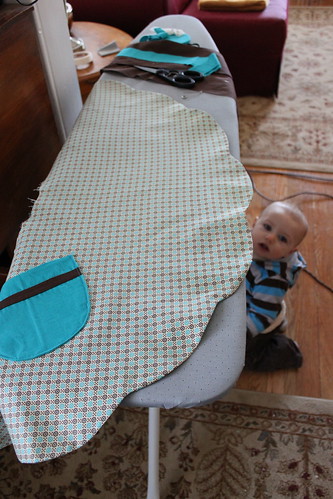
Turn your skirt piece right side out and iron all of the edges flat. It will take a while. Once you have your ironed skirt, baste two lines of thread along the waist area and gather it a little. You want the the waist of the skirt to be slightly shorter than the waistband.


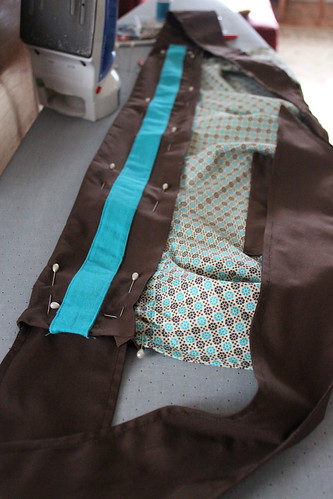
Next, I sewed the stripes onto the individual waistband pieces. Then I placed the two waistband pieces right sides together and sewed a line down one side. With that done, I opened up the waistband and pinned/sewed one side to the gathered skirt.Then I pressed all of the edges of the waistband inward to prep them for later sewing.

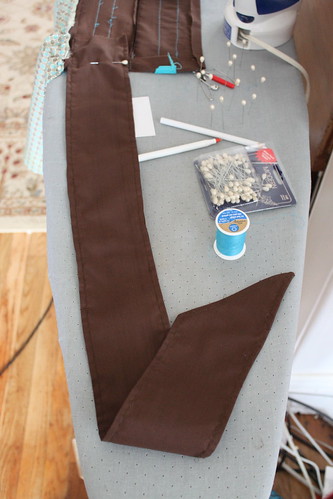
Finally, sew turn & press the apron ties.


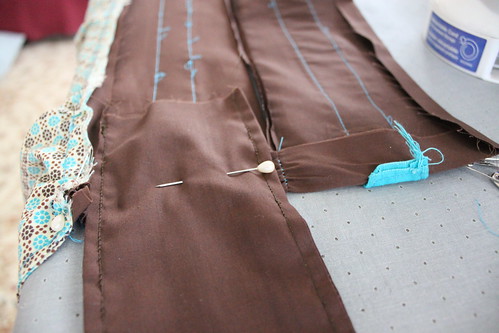
Then attach them to the open waistband like so:


We're going to fold the waistband into place and pin it over the end of both ties. Then we are going to sew a straight stitch all the way around the edges of the waistband.


All done! I decided to make little roses from scrap pieces of fabric to embellish the pockets...


Because, let's face it, the pockets needed those little flowers!! They told me so. There may have been crying, sniveling, and pleading. Being the magnanimous person that I am, I relented and granted their wish.


Again, I'll let Sarah do the modeling if she wants to. She's the one with the matching dress.


And I was wearing my pjs when I finished this thing. With bed head. While I'm sure this apron would make just about anything cute, I have to draw the line somewhere.

So, what do you think? Are you game to try it?

Adventures in Millinery: The Fascinator Hat

Remember that 50s style dress I made for my sister-in-law a while back?


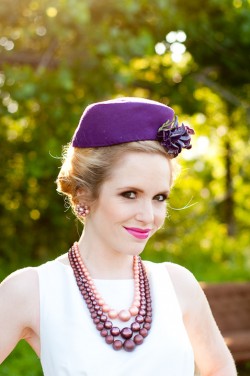
Well, I had some leftover fabric, so for her birthday, I decided to try my hand at hat making (millinery to the professionals). Specifically, I made her a vintage style pillbox & fascinator hat. If you aren't familiar with those styles, here's what they typically look like:


                  Pillbox Hat                                                                                           Fascinator Hat

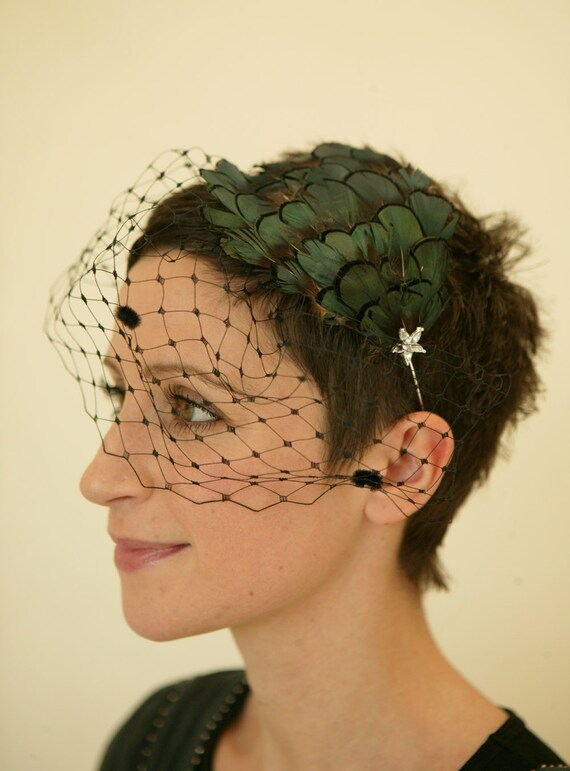
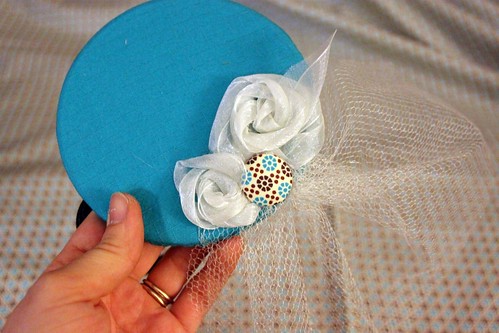
I'll share the pillbox hat in a later post, but here's the fascinator hat that I made:


How cute is that?! I got the idea after coming across this helpful video tutorial:


Easy, peasy!

I used a yogurt lid for the form. The whole time, I was chuckling to myself, "Ahahaha! I'm tricking Sarah into wearing a yogurt lid on her head!"


This was a strictly no sew, quick project. It was all done with a hot glue gun.


Of course, the assembly was quick. Hemming and hawing over the design may have taken a little bit longer.


"Hey, Theresa?? Do you think I can have a black band if there's going to be brown on the button?? Do you think it will clash?" Oh, boy, am I ridiculous! Fortunately, Theresa has no qualms telling me so.


So, now that we have the hat base complete, we just have to add the veil & decorate it. I decided to twist some shimmery ribbon into roses & hot glued them in place.


For the finishing touch, I added a covered button. And voila! Yogurt lid fascinator hat!


I'll let Sarah model it for you if she wants to.

So, go to it, folks! Have fun! Go crazy! Add feathers! You can't go wrong with feathers.

Tuesday, February 15, 2011

Dropcloth Curtains

I centered my bed on the back wall of my bedroom because it's the best place for it given the room's dimensions. The only problem is that the headboard overlaps half of the window on that wall and the whole thing just looks silly. So, I decided to solve the problem with curtains.

I was going to need a lot of really long curtains to accomplish the task and I wanted them to be heavy. I decided to go with canvas. The problem is, I needed a little under 24 yards of fabric and canvas fabric ranges between $6 & $10/yard. So. Not. Happening.

Canvas painter's dropcloths, on the otherhand, are about $10 for a 6'x8' at Walmart. I bought 3 of them and spent $30 instead of $148. Booyah!! And the really great thing about drop cloths is that all of the edges are already finished. Big time saver!

I washed & dried them and they were beyond wrinkly. So I used a spray bottle filled with water to dampen section of the drop cloth and ironed the wrinkles out. Trust me, you want to drench the fabric with that spray bottle. Those are some very stubborn wrinkles.

I then folded over one edge 4 inches and ironed and pinned it into place.


Then I sewed the fold into place along the finished edge.


I stole a 1x2x8 piece of wood from the lumber pile in the Sandwich Shoppe and slid the curtains onto it. Who needs a curtain rod when you have 1x2s?


I cut 4 one inch pieces of 1x2 and screwed them into the wall on a level line. One at either end and one in between each of the curtain panels. Then I screwed the 1x2x8 with the curtains already on it into those 4 pieces. Perfectly secure! And ta da! You can't even tell I used a simple piece of scrap lumber.


Does the curtain look crooked? I swear I used a level. The problem isn't the curtain. The problem is that when you live in a rickety old house, none of the ceilings or floors are level. None. of. them. In fact, they are very slanted. Like, hey watch the pencil scurry to the other side of the house slanted. I'll fix it later. The curtains, not the floors.

To block the light that was coming through the curtain from the window that I had covered up on the left side, I covered the window with a black trashbag. It worked perfectly and no one ever has to see it.


And that's how I made and hung canvas drop cloths in my bedroom. I'm not done though. I have a bunch of bedroom related tasks to complete before I'll share the whole room with you.

Monday, January 24, 2011

The First Step in Achieving Domestic Goddess Status...

...is owning a Vogue 1950s housewife dress.

Duh!

This post was originally titled, "HOLY MONKEY BUTTS! I MADE A 50s DRESS!!"

Let me explain...

My sister-in-law Sarah is constantly lusting after 50s style dresses. As I lust after pretty much ANY period style dress predating the 1960s (what a gross time for fashion), she usually shares her love of 50s fashion with me whenever she comes across a stellar example.

Consequently, I periodically receive emails like this:
I. NEED. THIS. DRESS.
I might die without it.

Obviously, this is a dress worth dying for. Just look at that skirt!


So, when it came time to pick out Christmas presents this year, I knew just what to get Sarah. A 50s dress. It was perfect! I can't have her dying on me, after all. Who else am I supposed to get tipsy with on the dock at Myrtle Beach this summer?

That being said... Have you ever looked at vintage dresses on Etsy?? They run anywhere from $100 to $400. INSANE. I love Sarah, but I also like paying my mortgage on time. Vintage dress patterns, on the other hand, are about $10 on Etsy. Can you guess which option I chose? No brainer. If you are ever looking for a vintage clothing pattern, you should check Etsy. Treasure trove!


I have no sewing skills or experience. I've only ever sewn one other dress in my life and that dress was straight out the Regency era (1811-1837). Think Pride and Prejudice. I wore it to a period Dolly Madison ball, drank punch, and danced the quadrille. Hey! I'm a history teacher, what did you expect?? Laugh if you want, but it was super fun. Hmph! My Elizabeth Bennett-esque dress was a bit loose, but it looked like a dress. So, it only stood to reason that I could sew something straight out of the 1950s. Right?? That's what I told myself, anyways.

But how to get Sarah's measurements without giving away my plans... Tricky. Maybe if I email her husband and ask him? Which led to the following email draft:
To Agent Rob 007. STOP.
Your mission, should you choose to accept it, is to measure every part of Sarah's body without her knowing. STOP. It is imperative that this mission be completed with the utmost discretion. STOP. I recommend giving her an Ambien and measuring her in a drugged sleep. STOP. It's not at all creepy. STOP. Guard these measurements at all costs. STOP. Even with your life. STOP. Trust me, they are more important than you. STOP.
This telegram will self destruct in 10 seconds. 
Hmm. On second thought, I'm not sure he'll agree to something like this. Discard draft.


I'll just have to measure her myself at Thanksgiving. And tell her to mind her own business. She has no right to know what I'm doing with measurements of her body. Besides, do you see those measurements? What a ho. She's so tiny! The first two times I took her measurements, I lost them, hence the "DO NOT LOSE" written across the top. And Sarah made me redraw her "model" a few times. She seemed to object to my Boobless Sarah Snowman. I can't imagine why. Picky, picky.

To put off any suspicions she might have, I informed her that she might be receiving a portable pole dancing platform for Christmas and that she should probably start practicing dipping at the waste and then flinging her hair back provocatively. Just in case. She was ecstatic because she'd always wanted a portable pole dancing platform to set up in Mantown. I told you she was a ho.


I found this gorgeous turquoise linen fabric in Walmart's clearance section for $1.50 a yard. SCORE! I purchased 5 yards of it, some fabric button kits and matching thread. That's right. Between the materials and the pattern, I spent (Sarah, shield your eyes) a whopping $20 on this dress. Booyah!

The pattern itself was a vintage size 18 1954 Vogue dress pattern. FYI, vintage sizes are roughly double your modern size. The pattern itself was "Oh my gosh, if I touch this it will turn to dust!" tissue paper old. I loved it. It was awesome. Except for the directions. Not so awesome. Very, very confusing.

Fortunately, my mother speaks sewing and interpreted for me. Thank heavens for mothers who actually learned how to make clothes in home economics. As opposed to my experience in home economics... where I learned... nothing? Yup. Pretty sure I learned nothing.


Notice the lack of directions on this pattern? Just a bunch of dots and squares and triangles and Vs. Gotta love vintage. The pattern assumes that you are a good little 50s lady who took real home economics classes and know what the heck you are doing. Yeah, not so much.


As for the wrinkles in the tissue, I highly recommend ironing all of the pattern pieces. It makes it easier to pin them to the fabric and cut everything out correctly.


Pin, pin, pin. Expect the tissue to tear. Trace EVERYTHING with a chalk pencil. Every little dot, v, and square. Make sure you've pinned your pattern in the right direction and to the right side of your folded fabric. Words like "bias" are involved, but I really can't explain what the heck that means. I just know that it has to do with the weave of the fabric and your dress won't hang correctly if you get it wrong.


So BE VERY CAREFUL and follow the directions closely! Double check if your pattern piece is supposed to be on the fold or on the selvage (edge). The tracing and cutting of the fabric is very time consuming and probably took about 5 hours. So be forewarned if you decide to take on a project like this.


After all of the cutting, finally getting to the sewing is a relief. This is one of the sleeves. It requires "easing."


Meaning, it's too big for the hole that it attaches to on the bodice, so you have to baste stitch (loosely stitch), pull, and make it fit without causing any wrinkles or tucks. Keep the iron on at all times. It's crucial to keeping all of your seams neat and tidy. Oh, and did you know that the lines on the dress that go up your back to your shoulder blades and up your front to your boobs are called "darts"? I learned sooo much making this dress.


The most important lesson: Pins are your friends. Become one with the pins. Love the pins. Worship the pins. Even when they stab you in the finger, bow down before the Pin God and thank him for his minions.


For me, the satisfying part of making clothing is sewing everything inside out, then removing the pins, and seeing what it looks like on the outside. But the best part of this whole project? Covering the buttons! It's so much fun!


Easy, too. You simply layer all of the pieces together and push down on them until the button back holds everything in place. Aren't they adorable?


Yes, they are. My sewing machine has a special foot attachment for buttonholes. It makes holes the perfect size for your chosen button. It only took me about an hour and a half to figure out how to work it...


I heart buttons.


I actually somewhat changed the pattern of the dress by adding in two extra skirt panels to ensure proper twirlage and skirt fluffiness. I had to incorporate extra gathering in the back to adjust for the panels, but Sarah really digs fluffiness, so it was worth it! You might say she has a minor obsession with fluffy poufyness. From her wedding dress to her curtains. It kind of makes me wonder if she was raised by baby chicks and clouds. Probably.


If you want a proper, even hem, you have to make your model wear the dress and measure the same distance up from the floor all around. Mark it with pins or chalk to sew it up later. This keeps the dress from rising higher in the back because of one's butt. You are also supposed to use a blind hem stitch on the hem so that you can't see the stitching. My machine does this for me, but I added in iron-up tape just to be safe.


For the belt, I simply found an old belt in my closet and covered it. The buckle part comes apart and gets covered in the same manner as the buttons.


Dude. I made a dress!

It was a lot of work and it took about 6 days altogether, but it was a fun project and I really enjoyed it. For my next dress, I'm either going to make a Renaissance or a Victorian gown. Probably Renaissance first. I need something to wear to the Renaissance Fair in Maryland next year. Not that I'm a geek or anything. Ahem.

So, without further ado, I'd like to introduce my sister-in-law Sarah. THE Domestic Goddess.


Reigning supreme in her beautiful kitchen. Except for the part where she doesn't cook... But she sure is purty! ;)

For the chance to see even more fluffy dress shots and possibly a stunning blue tutu, check out Sarah's blog post here.

Now, I'm off to lust after pretty Renaissance dresses...


It's only $575. Only.