Showing posts with label DIY Projects. Show all posts

Monday, May 9, 2011

Chalkboard Wars

It's begun.

The Chalkboard Wars.

I can see it now. A neverending exchange of (not so) witty insults. A vicious cycle of juvenile name calling. A perpetual show of sibling rivalry.

The perfect environment in which to raise a kid.

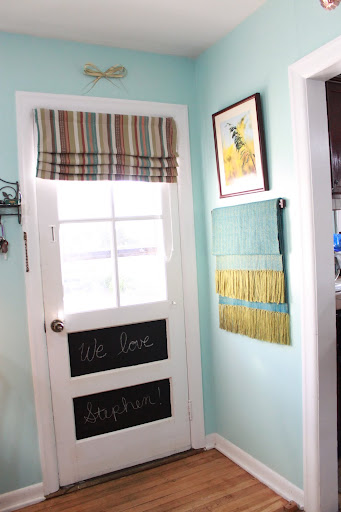
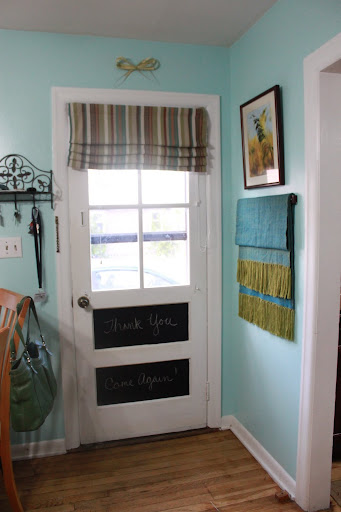
Remember how I chalkboardified the panels of our kitchen door?  Well, they've become something of a message center for people exiting our home.


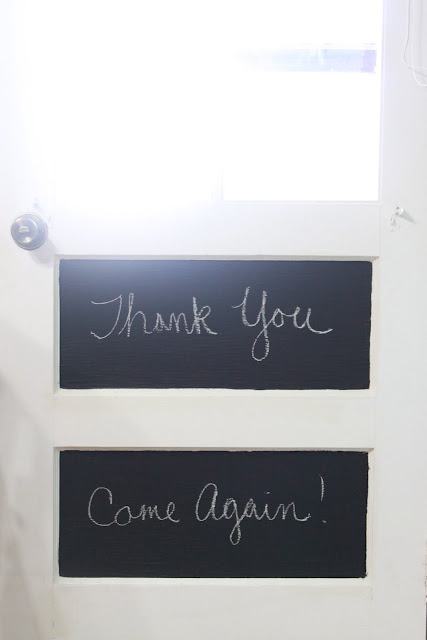
In a rare & misguided tenderhearted moment, I changed the message on the door from "Thank You, Come Again!" to "We love Stephen!" (We being Joseph & myself.) Will I never learn?


That evening, Theresa, Stephen's sister, crossed out Stephen and wrote her name. So, the door read, "We love Stephen Theresa!" Fair enough. We do love Theresa. How can you not?

Then, the next morning, before I could even take a picture of Theresa's handiwork, I discovered that the message had been altered yet again by my extremely mature and adult husband.


Oh, yeah. This is definitely the start of something great...

Thursday, May 5, 2011

All Because of a Candy Striped Shower Curtain

Sometimes you get lucky and stumble across a cinch piece. That perfect bit of art, fabric, or furniture that can tie a whole room together. With that single discovery, everything else just clicks into place. It's wonderful!

Sometimes you get really, really lucky and you stumble across a cinch piece that is 100% FREE! Woot!

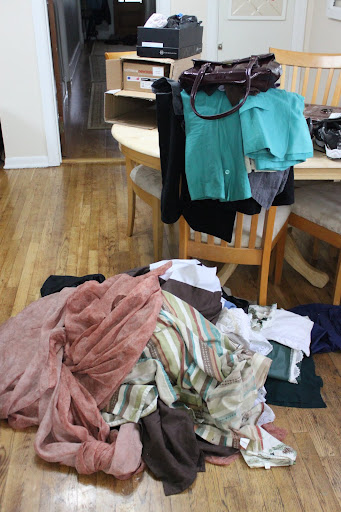
A couple of months ago, my sister switched apartments. In the process, she went through all of her belongings and gave away a bunch of stuff.  I gleefully took some of her clothes and linens. I'm a serious sucker for free stuff. It's a problem.


So there I was, standing in the kitchen, staring down at my new pile of linens, and contemplating their potential uses... when the light bulb went on.

"OH MY GOODNESS!!!!! THAT STRIPED FABRIC WOULD MAKE PERFECT KITCHEN CURTAINS!!!!"

Everything snowballed from that point on.


If you give Caroline fabric for curtains, she'll want a new wall color to go with them. If you let Caroline pick out a new wall color, she'll want to switch out all of the art work. If you let Caroline switch out all of the artwork, then she'll want to turn her door into a chalkboard. If you let Caroline create a chalkboard list making location, she'll want to completely rearrange all of the furniture in her house. Et cetera.

See. Snowball effect.

Personally, I blame my sister Sarah. She gave me the "must change everything around once a month" bug. You'd think as a physician's assistant that she would warn me it was contagious, but did she? No. Wench.

I'm leaning more and more towards bright happy blues and greens in my home lately. So, I pulled out all of my cheerful turquoise/teal blue paint chips and after about 5 minutes of deliberation and elimination, I settled on Eddie Bauer's Signature Weathered Glass.


It's super cheerful. Like "you WILL smile while you scrub dishes" cheerful. When I first painted the kitchen, I kept waffling back and forth between, "I LOVE IT!" and "OH, GOD, WHAT HAVE I DONE?!?" Now that I've lived with it for a while, I definitely love it.

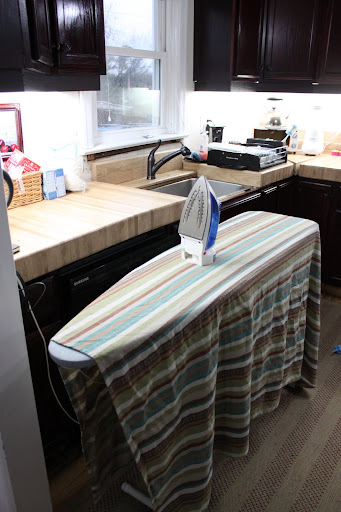
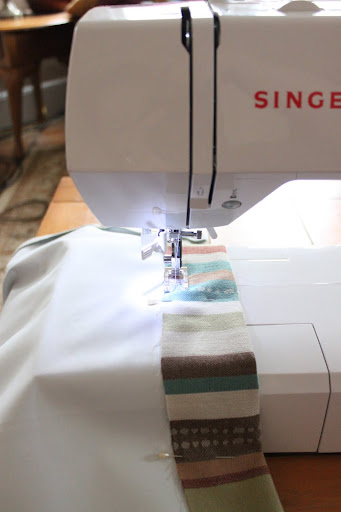
Anyways, back to the destiny of that fabulous striped fabric. After coming across fixed flat roman shade tutorials at both Centsational Girl and Fly Through Our Window, I'd been itching to make some for my kitchen. So I put on my sewing cap and got to work. In my kitchen. Is it weird to sew in your kitchen?? Inquiring minds want to know.


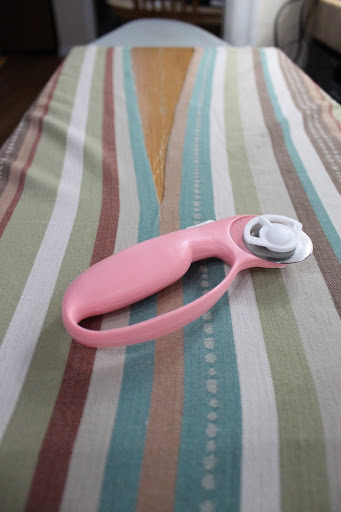
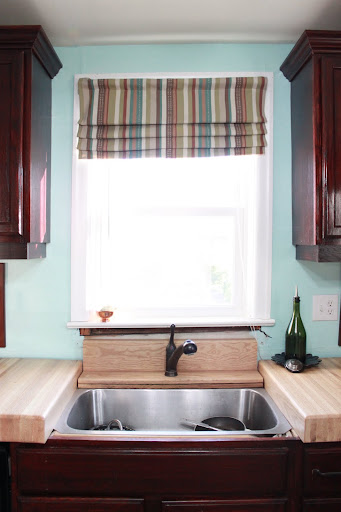
Did I mention that the striped fabric is my sister's old shower curtain?? Yes. You heard me. Her shower curtain. Crazy, I know, but when I cut it into fourths, there was just enough fabric to make shades for all four of my kitchen windows. It was meant to be.


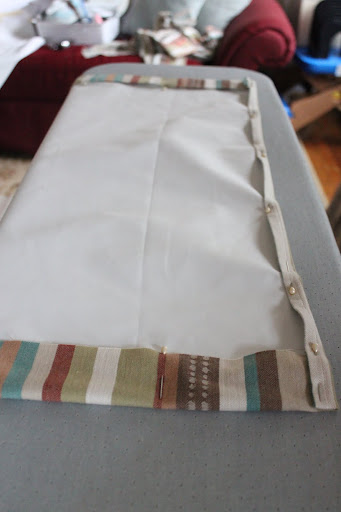
I had some black out fabric leftover from the nursery.


 So, I lined each of the four pieces of the shower curtain with it.


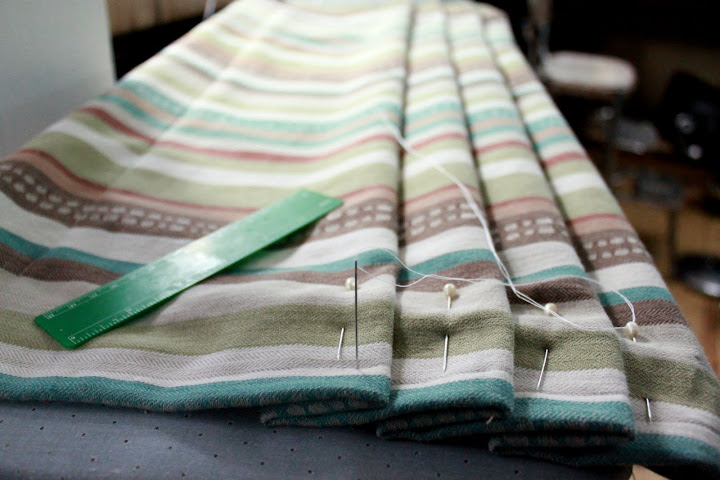
After that, it was simply a matter of figuring out the width and number of folds and tacking them in place.


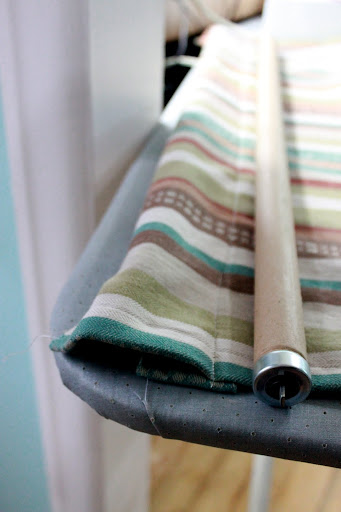
I slid dowels into each of the folds to keep them from sagging. As for hanging the curtains up, I used the rods from the icky old vinyl shades that were hanging in the house when we first bought it.


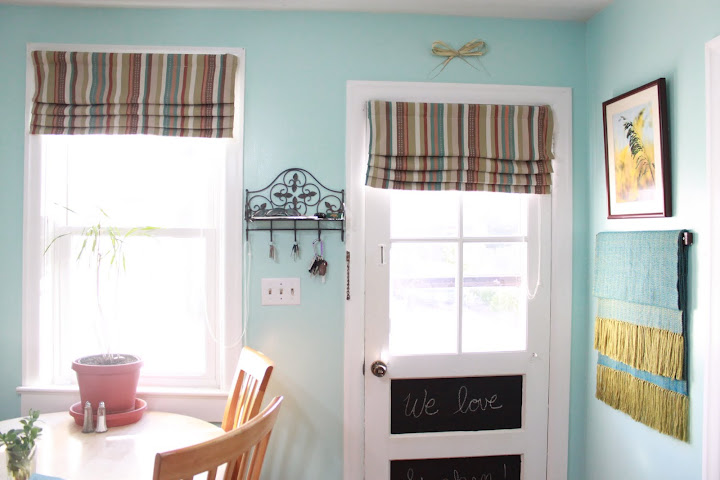
It took me a while, but it was actually a super easy project. And I'm in love with the results.


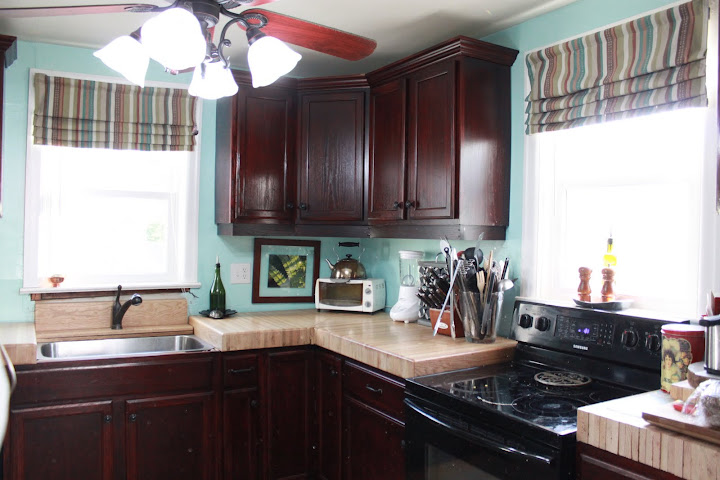
They are fabulously bright and cheerful. They make me think of candy stripes. And candy is always good, right?

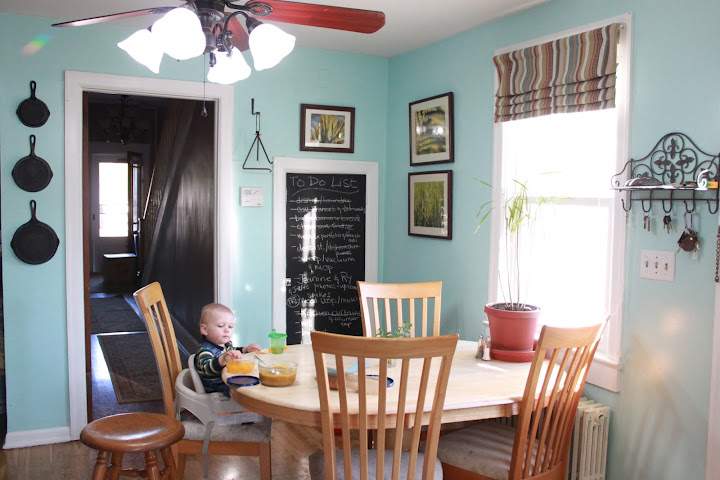
Ignore small child consuming mandarin oranges. He's not relevant to this post. Oh, who am I kidding. He's cute and fantastic. Please admire him at your leisure.

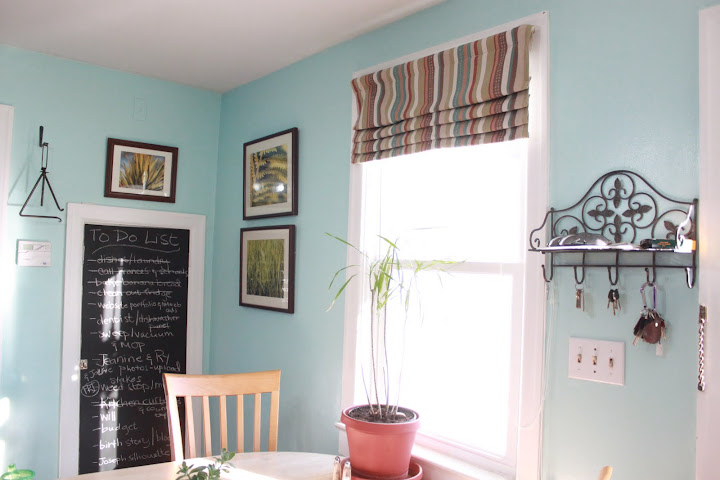
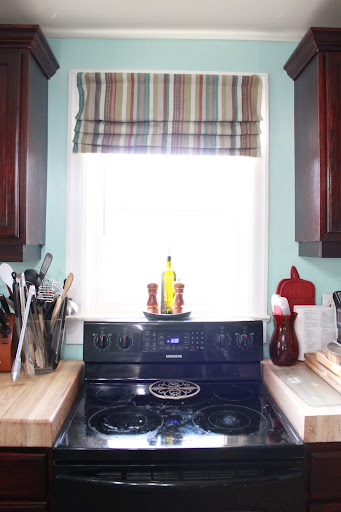
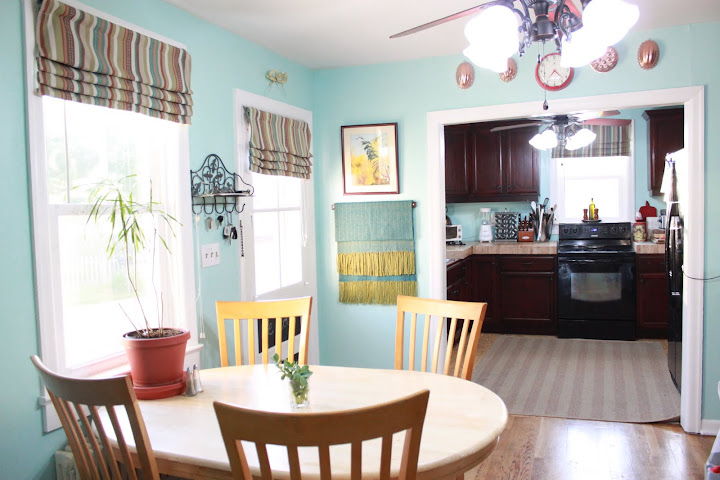
The burgundy stripe in the fabric perfectly complements the cabinets while the rest of the stripes allow me to bring a variety of other colors into the room.

Wait, could that be a triangle hanging next to that ridiculously long and unrealistic "to do list"? Surely not. She doesn't really announce dinner with a triangle does she?? Nuts.

Yup, my candy stripe shades give me the courage to play with such colors as turquoise, green, and orange. Colors make me happy :). I need rainbows, stat!


Now I just have to figure out how the hell I'm going to build a sink surround.


And finish gluing/sanding/varnishing the counter top to the right of the stove.


Maybe build some more shelving, install some backsplash, and rearrange everything. You know, just a few small little tasks that need taking care of. *sigh* It's only been two years. What's a little more time?

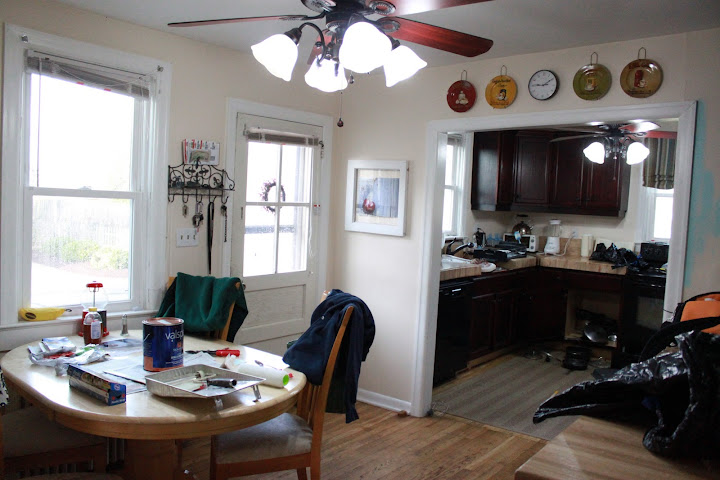
I was determined to wait until the kitchen was completely done before showing it off to you... but it's been over a month and I can't stand it anymore. I'm more of a "Hey, look at my progress!" kind of girl. So, here are a few before and afters:

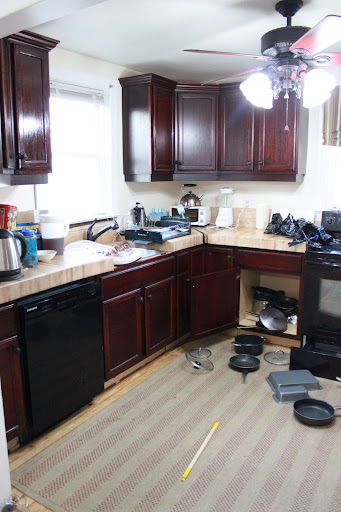
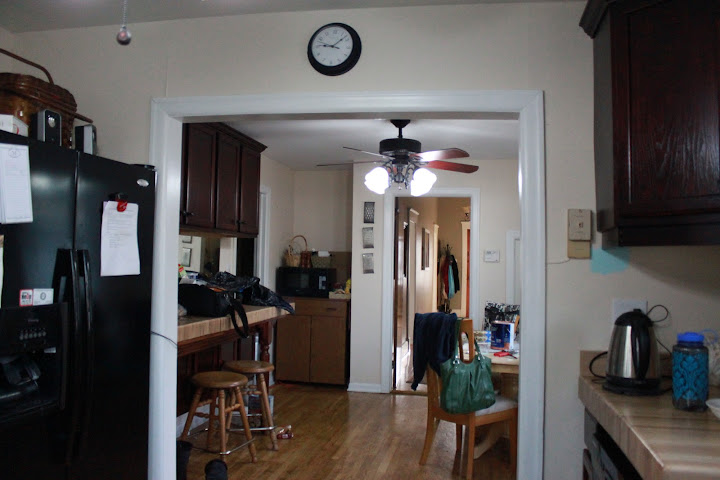
Before - Beige & Bleh
I have a sneaking suspicion that Hurricane Joseph has been in the cabinets again.

After - Colorful Awesomeness

Before

After

Before

After

I think the shades work really well with the rug as well. I'll share more about the artwork in the kitchen in a later blog post. For now, I'm just going to enjoy my candy striped windows.

Tuesday, April 26, 2011

Homemade Kitchen Chalkboards!

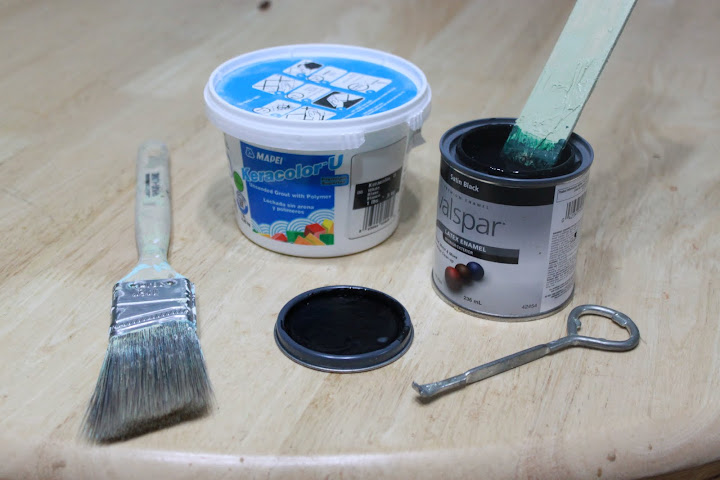
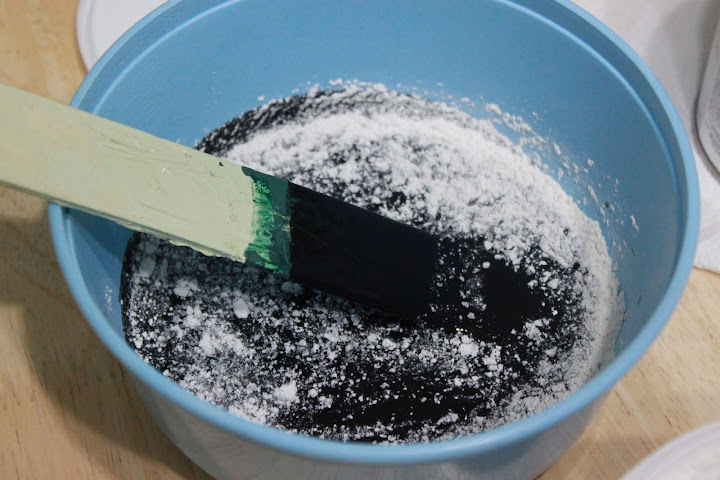
Did you know that it is ridiculously easy to make your own chalkboard paint?? All you need is 2 tablespoons of unsanded grout for every cup of paint.


Mix them together & voila! You have chalkboard paint. Which kind of looks a lot like sludge if I do say so myself.


Thank you, Centsational Girl Martha Stewart for gifting me with a cheap and addictive decor-related substance. That's just what I needed.

Sure, I could have bought a can of chalkboard paint from Lowes for $15... but if I had an entire can of chalkboard paint, I would probably try to chalkboard-ify everything in my house just to use it up.


Instead, since I already had some leftover black paint at home, I bought the smallest quantity of unsanded grout I could find for $4. Now, I can take any color paint and make it into chalkboard paint. Hmm. The teacher in me has a sneaking suspicion that everything in my house just might end up chalkboard-ified after all... Just not in black.

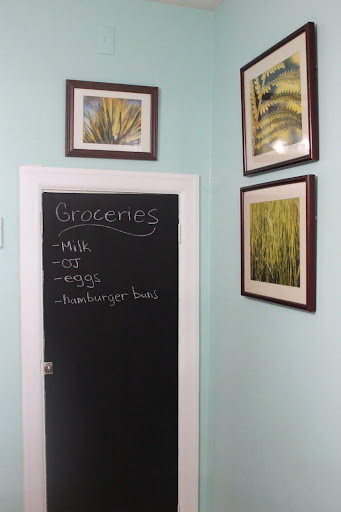
Starting with the under the stairs closet door in the kitchen. Here's the before:


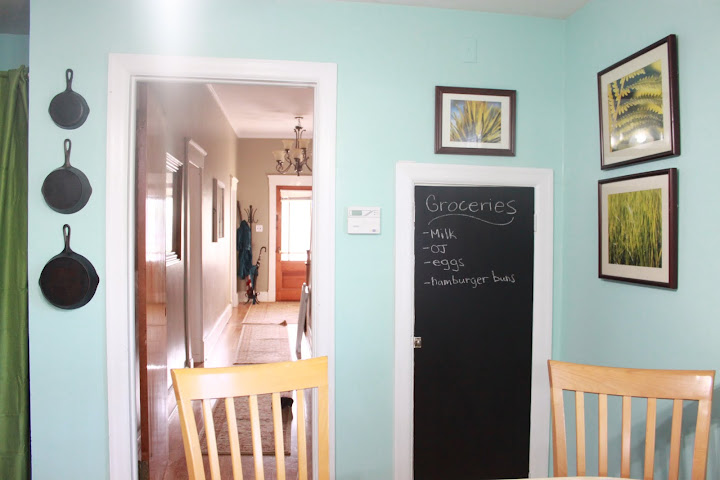
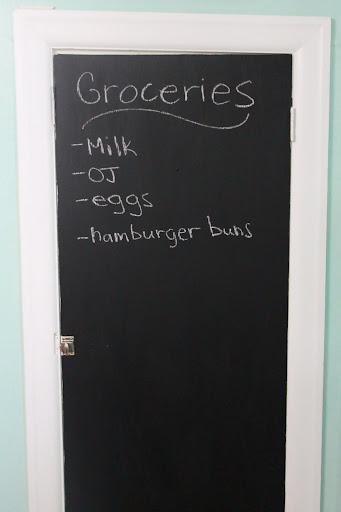
And here's the after:


Did I mention that I'm in the process of redecorating the whole kitchen? Because I am. Consider this a sneak peek until I finally finish the counters, curtains, and shelving.

I debated going with green chalkboard instead of black, but with the black kitchen appliances and my collection of cast iron pans, black ultimately won out. I think it was the right decision. Thanks, Sarah, for giving me a friendly shove in that direction!


Now I have a list writing center. In plain view. Where I'm less likely to ignore it. Probably.


Look at all that space for lists! Ridiculously long, unreasonable, unobtainable lists, here I come!

Unable to stop with the closet door, I turned my attention to my poor, sad, stained, off white, kitchen door...


*shudder*

A couple of weekends ago, my sister-in-law Sarah (of Five Camels) and I were sitting in the kitchen discussing decor plans, when Sarah turned to me and said:

Sarah: Do you know what that door needs?
Me: What?
Sarah: Chalkboard panels.
Me: HECK YEAH! Genius!


We don't get along at all. ;)
Fast forward a few weeks and the door looks like this:


(Sarah - I totally copied your above door Palm Sunday palm display... because I really liked it!)

The door will probably end up being Joseph's "list writing" center. You know. For all those lists 2 year olds like to scribble write.

(Think Apu Nahasapeemapetilo from The Simpsons)

Wasn't that fun??

Now. I need someone to physically restrain me before I give in to further temptation...


Mmm. Chalkboard paint. The new Meth. Right, Sarah? ;)

Wednesday, March 30, 2011

Classy Champagne Soap

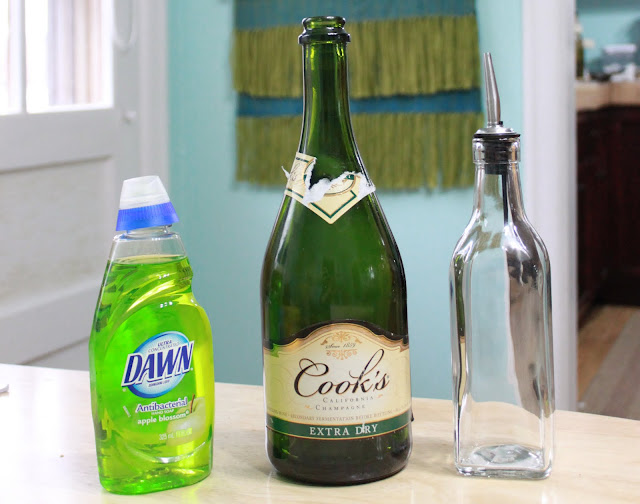
For the past couple of months, I've been hoarding collecting glass bottles in the kitchen with a variety of uses in mind for them. Today, I took the first step toward utilizing them.

Meet our New Year's Eve champagne bottle:


The first step was to remove the labels. Why do labels always have to be so uncooperative anyways? If labels were criminals, they would always have "resisting arrest" and "assaulting an officer" added to their list of charges. Little punks! I didn't bother soaking the bottle. After ripping off what I could, I pulled out my trusty razor blade and got to scraping. Just as good as Goo Gone.

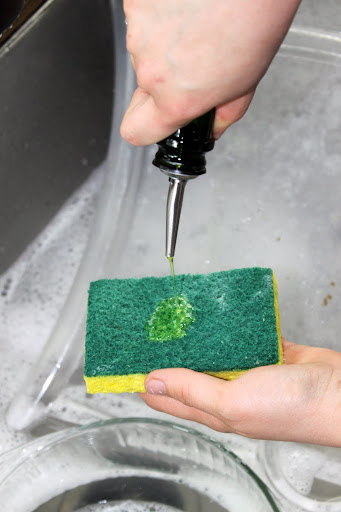
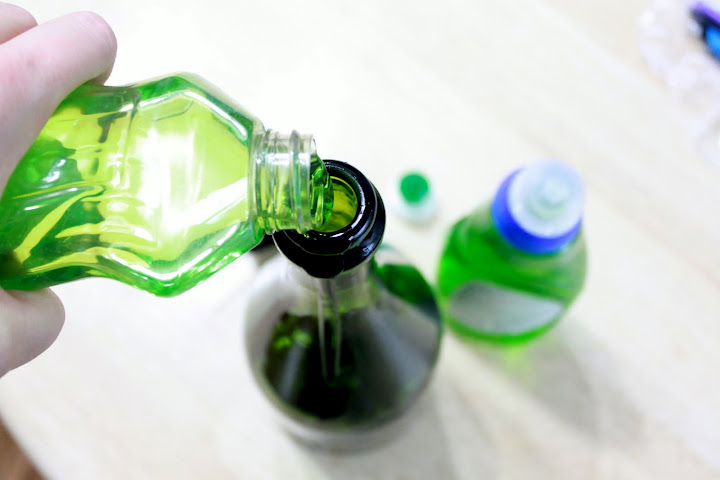
Once the bottle was clean and free of it's label, I poured in a mixture of soap and water.


Then I topped off the bottle with an old olive oil spout. I like it! I like it a lot!


Time to test it out. The soap came out too slowly, so I poured some of the soap back into it's original bottle to  make room for more water. I added water and mixed it with the soap until it came out at a satisfactory speed (necessary, since you can't exactly squeeze a wine bottle...).


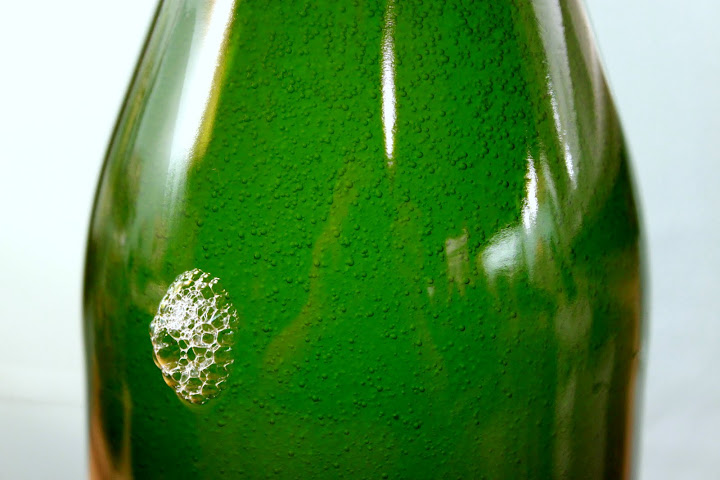
Stephen doesn't like it. He says it looks silly. I am completely ignoring him (with affection). I love the bright green color and the shape of the bottle. I think it's a big step up from simply using the store bought plastic soap bottle. I love that I didn't spend any money on it. And, most importantly, I am the one who does the dishes. So the bottle stays. FOR. EV. ER. (Name that movie!)

Besides... The bubbles look super neat after you finish pouring the soap!


I want a matching bottle for my stove-side olive oil. And maybe a cute method to label the two bottles so they never, ever get mixed up. Blech. Anyone out there have some nifty labeling ideas? The label would have to hold up after getting wet. That's the tricky part.

Now, I just need a good reason to buy some champagne. So, my dear sisters-in-law, how do you feel about Mimosas this weekend?

Friday, March 11, 2011

Adventures in Millinery: The Pillbox Hat

Now that we've made a fascinator hat and an apron, let's make a pillbox hat!

As I have NO IDEA WHAT I'M DOING and have never made a hat in my life... I found this very helpful video tutorial on youtube:


Isn't she great? Applause!

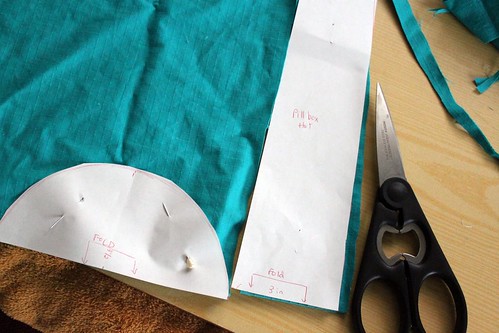
So, let's get started by cutting out our fabric with our homemade pattern... I really like finding free patterns or directions for patterns online. It's one of those little things that makes me happy.


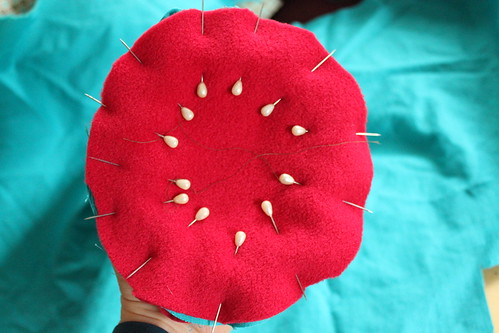
Humble Bumblebee used a heavy weight fabric, but I wanted to use the same lighter weight fabric that was in the dress, so I also cut out some heavy weight fleece with the same pattern to line the hat with and make it hold it's shape better.


And from that point on I had some difficulties due to the added lining and a few stupid mistakes on my part... So I got a bit focused and frustrated... and forgot to take any more pictures... Fortunately, Humble Bumblebee has got my back and you can follow her superb instructions. I want to try this project again soon with a more appropriate fabric.

Due to my fabric choices, I still didn't think the hat would hold it's shape as well as I wanted it to, so I hot glued & sewed another yogurt lid into the inside top of the hat. It made the form more rigid and had the added bonus of tricking Sarah into wearing another yogurt lid on her head. Bwahahaha. Evil Sister-In-Law strikes again.

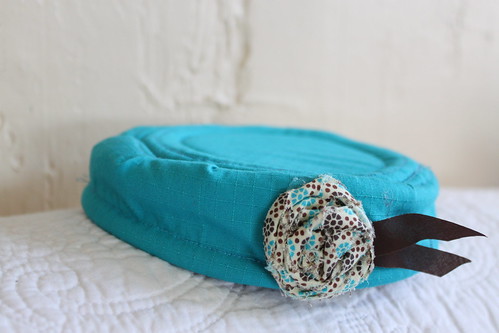
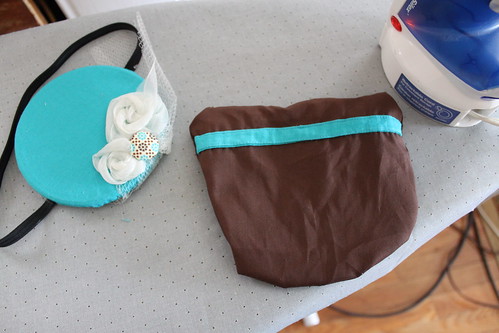
Anyways, this is how it turned out.


I made another fabric rose and hot glued it into place... but it seemed lonely, so I gave it two little brown tails. I think they make the hat. Overall it turned out well, but I still want to try again with a thicker felted material some time.

Next, though, I think I want to attempt a newsboy cap for Joseph. I have this idea for a one year photoshoot stuck in my head.


I've got some green tweed that should work nicely... I'll let you know how it goes...

Wednesday, March 9, 2011

Reversible Retro Scalloped Apron Tutorial

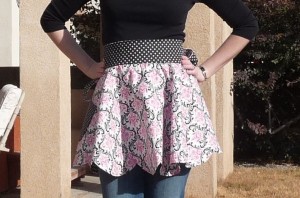
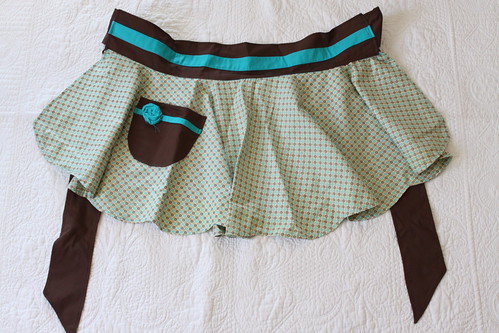
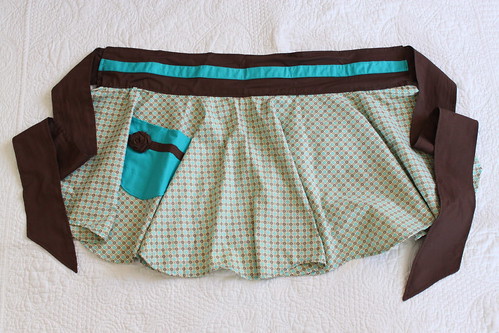
In addition to making hats for Sarah's birthday, I also made the most adorable retro reversible scalloped apron.

I found a free apron pattern & tutorial at this site.


And quite frankly, the apron was too cute for me to pass it up. The wide waistband, the fluffiness, the scalloped edging! Clearly, Sarah's 50s dress needed this matching apron, so it was the perfect excuse to get crafty!

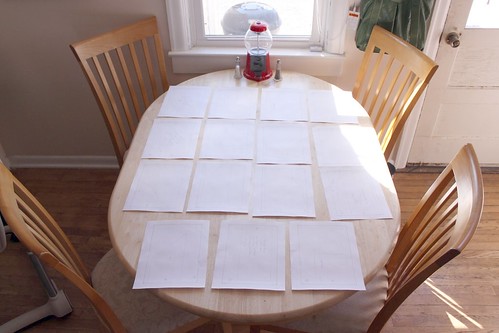
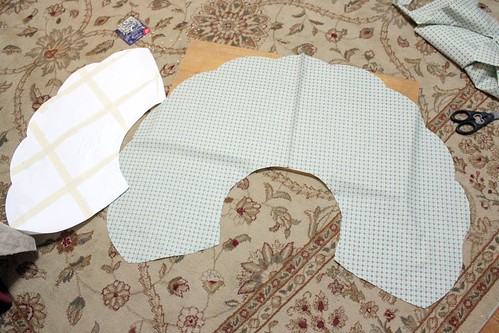
You have to print the pattern out on 15 different pages.


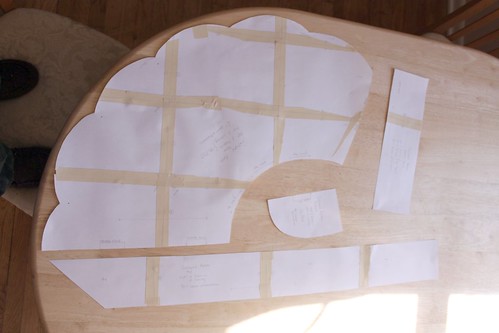
Trim the edges, match up the letters on each side, tape them together, and cut the pattern out. It's genius! The pattern pieces even have directions already written on them.


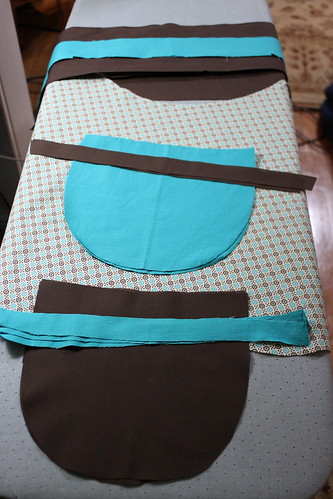
Here are my fabric choices. There's the turquoise that I used for Sarah's dress, a plain chocolate brown, and this sweet patterned fabric to tie it all together.


Follow the directions on the pattern pieces to cut out your fabric.


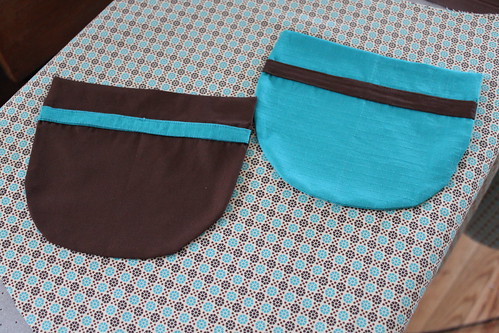
Since this is a reversible apron, decide how you want to alternate your fabric on either side. I decided to have the waistband and skirt portions the same, but to have different colored pockets.


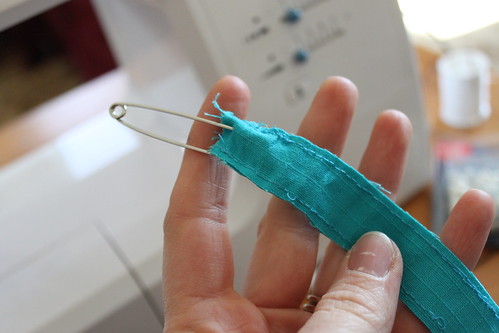
I also decided to embellish the waistband and pockets with a single stripe. So, I placed two strips of fabric together, sewed a line down either side, turned it inside out, and then ironed it flat. The easiest way to turn a long, narrow piece of fabric inside out is to safety pin the end and then feed the safety pin through to the other side.


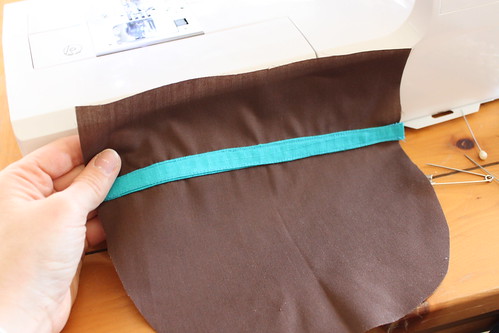
Sew you ironed stripe onto the right side of your pocket piece.


Then sew the two matching pocket pieces (right sides together) using a 3/8 inch seam allowance. But remember to leave a gap so that you can turn the pocket inside out. The tutorial says to leave the hole in the top straight away part of the pocket (which is what I did), but then you have to hand sew it shut. If you leave the gap in any other part of the pocket, it will get sewn over by the machine when you sew the pocket onto the skirt.


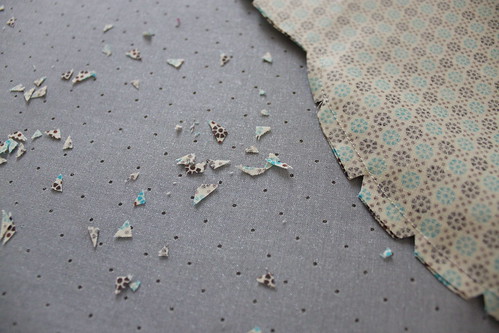
Trim the edges of the pocket, cut triangles out around the curved parts (be careful not to cut the sewn part), and then turn your pocket inside out.


Iron it flat. I find that it is helpful to use a pin to pull out the corners and curves as you iron. Repeat the process with the second pocket.


Then determine where you want the pockets to be on each piece of your skirt & sew them in place. Be careful not to sew the top of the pocket closed. I did that without thinking the first time & had to rip out the stitches.

Next, pin the two skirt pieces right sides together and sew around the edges with a 3/8 inch seam allowance. Do not sew the waistband together. Trim the edges around your sewing and cut triangles out on all of the scalloped curves. Again, be careful not to cut through the thread.


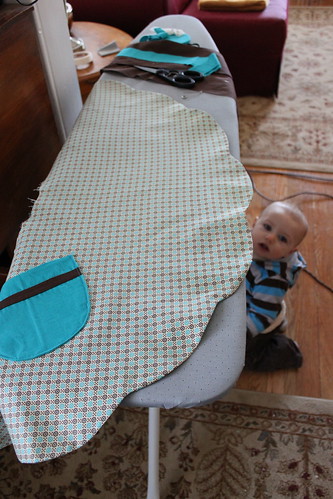
Turn your skirt piece right side out and iron all of the edges flat. It will take a while. Once you have your ironed skirt, baste two lines of thread along the waist area and gather it a little. You want the the waist of the skirt to be slightly shorter than the waistband.


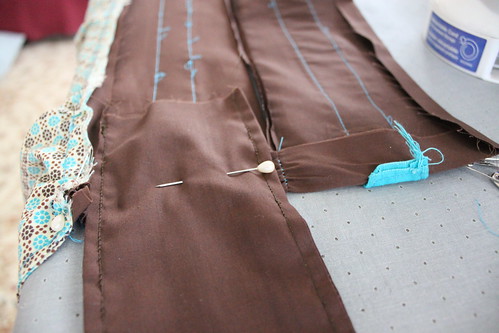
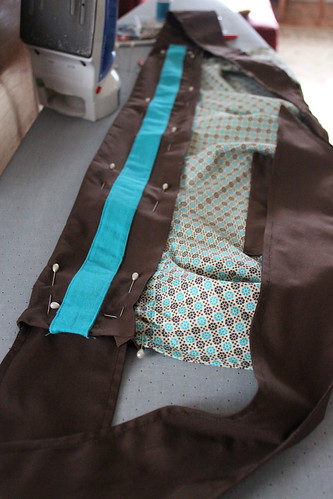
Next, I sewed the stripes onto the individual waistband pieces. Then I placed the two waistband pieces right sides together and sewed a line down one side. With that done, I opened up the waistband and pinned/sewed one side to the gathered skirt.Then I pressed all of the edges of the waistband inward to prep them for later sewing.

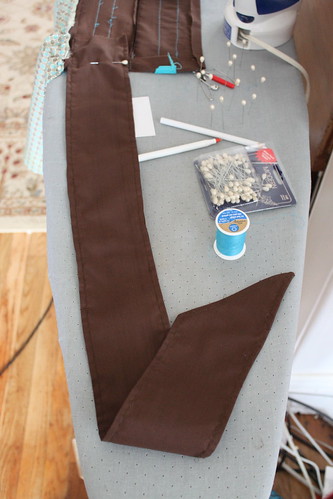
Finally, sew turn & press the apron ties.


Then attach them to the open waistband like so:


We're going to fold the waistband into place and pin it over the end of both ties. Then we are going to sew a straight stitch all the way around the edges of the waistband.


All done! I decided to make little roses from scrap pieces of fabric to embellish the pockets...


Because, let's face it, the pockets needed those little flowers!! They told me so. There may have been crying, sniveling, and pleading. Being the magnanimous person that I am, I relented and granted their wish.


Again, I'll let Sarah do the modeling if she wants to. She's the one with the matching dress.


And I was wearing my pjs when I finished this thing. With bed head. While I'm sure this apron would make just about anything cute, I have to draw the line somewhere.

So, what do you think? Are you game to try it?