
Each morning, when Joseph wakes up, this is the first thing he sees from his little toddler race car bed:
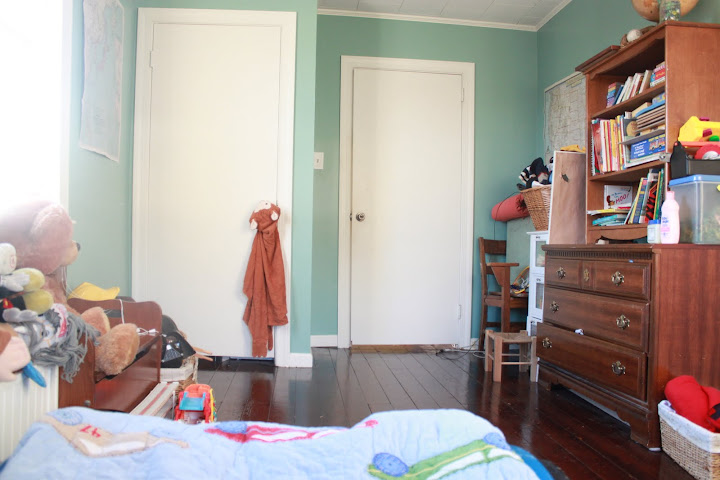
Trust me, it's a work in progress. By no means close to done.
And what's the first thing Joseph does after looking around? He climbs out of bed, runs over to his dresser, grabs his stool, climbs up and grabs a book. Then he runs back to his bed, tucks himself in, and reads said book:

Seriously. He rarely ever cries when he wakes anymore because, Dudes! He can climb out of bed on is own and there are books! So, he just reads to himself for a while, maybe plays with Scout or Mickey for a bit until he gets bored. Then he runs over to his door, knocks on it, and says in the politest of questioning tones, "Mama? Dada? Dada? Mama?" All while knocking for someone to come get him. We know this, because 1) we can hear him from our room, and 2) Stephen set up a webcam above his door. It's kind of hilarious.
Are you at all familiar with the "How Do Dinosaurs...?" series by Jane Yolen & Mark Teague? They are wonderful.
We have several of them and they are some of Joseph's favorite books, so Stephen illustrated & wrote his own version about Joseph's morning routine using the same basic story line. It's pretty cute. You should check it out!

Anyways, back to the point of this post. I kept having visions of Joseph's bookshelf toppling over on him one morning when he decided he needed that *one* book on the third shelf.
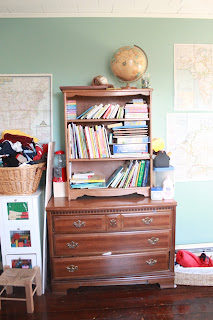
They were not nice visions. Nope. I didn't like them one little bit. Squished toddlers just aren't my thing. I had originally put his bookshelf up on his dresser to make more room and because the kid likes to pull EVERYTHING off of bookshelves and then toss EVERYTHING onto the floor (which, BTW, drives me crazy).
So, I started brainstorming solutions for a better bookshelf system for my tiny book-obsessed child and I remembered having pinned super cute forward facing shelves on Pinterest ages ago.

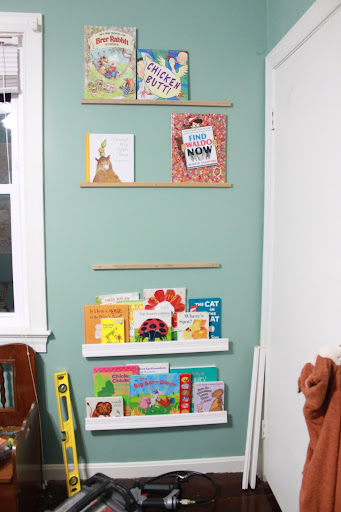
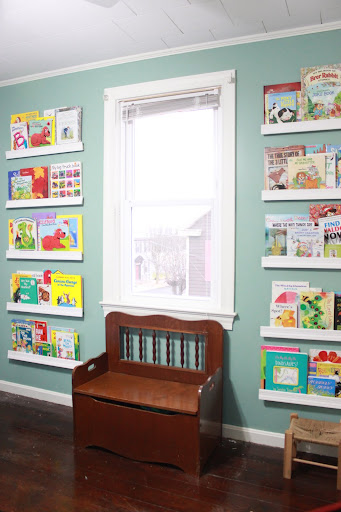
Perfect! I love them! Joseph can see the covers of the books without taking them all off the shelves. I can rotate the books from higher to lower shelves and avoid reading the same book 50 million times when I get sick of it. No one is getting squished by bookcases. Everyone is happy.
Now... how to make them without spending any money... Always my #1 goal. You all know how much I love free stuff...

Then I remembered the pack of door molding which I pilfered from my father's garage a while back along with a bunch of other furniture and home improvement items.

Yes sirree, the same free molding I used to spiffy up the fronts of my kitchen pantry shelves:

Forward facing shelves were SO happening and all for the lovely price of $0. Call me El Cheapo.
I decided I wanted the shelves on either side of the window on this wall:
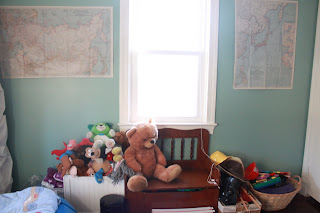
That way, Joseph could sit on his toy chest/bench right under the window and read with plenty of light. I cleared away the baskets of toys and got to work. By the way, I'm currently working on a better storage system for all the toys. I'll let you know how it goes.
I went through our "wood shop" which is actually the back of the Sandwich Shoppe right now and gathered small lengths of scrap wood that were perfect for setting books on.
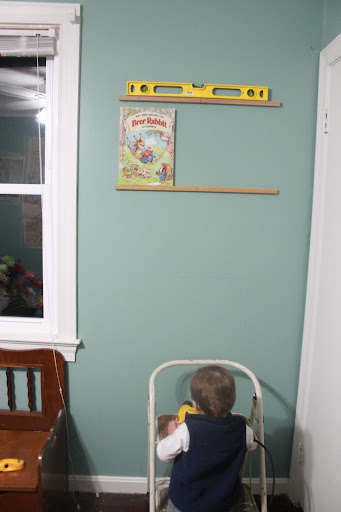
I measured the tallest book in Joseph's entire collection to determine the distance between the shelves and settled on a whopping 15 inch spacing.
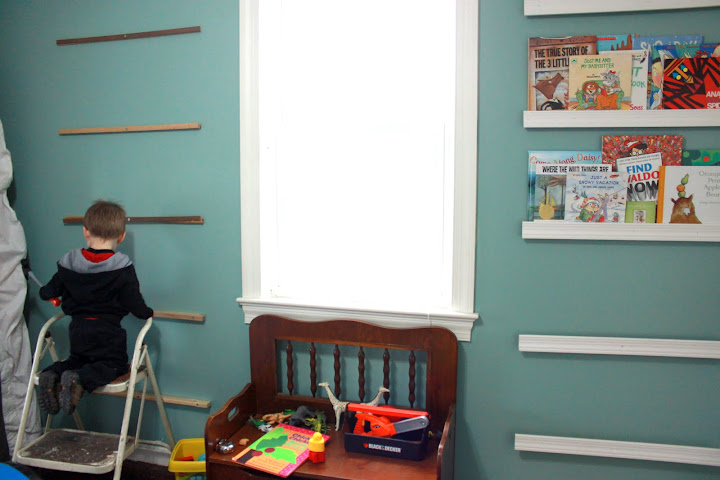
Meanwhile, Joseph played with his dinosaurs and animals. Please note, the tiger on the step ladder. Very helpful.
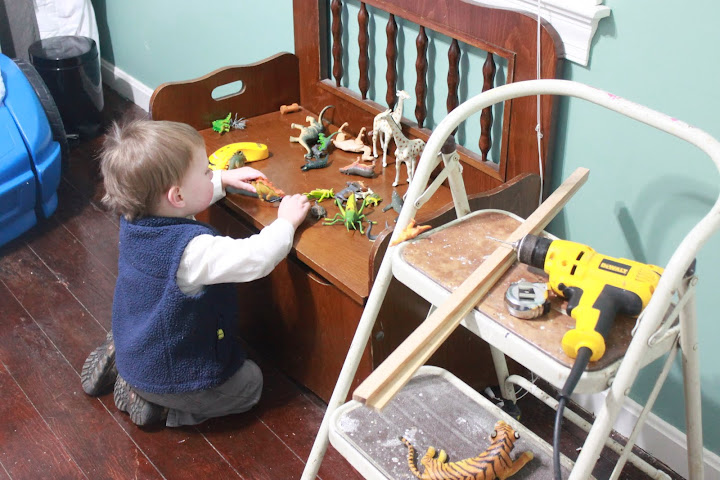
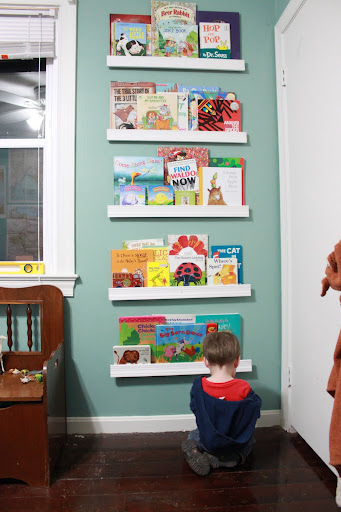
I installed 5 "shelves" in all. I marked out level lines on the wall with a pencil, drilled holes in my scrap pieces so they wouldn't split, and then screwed them into the wall using studs whenever I could find them (old houses with lathe render stud finders useless... grumble grumble... Stephen usually just ends up passing the stud finder over himself and grinning at me *rolls eyes* grumble grumble).
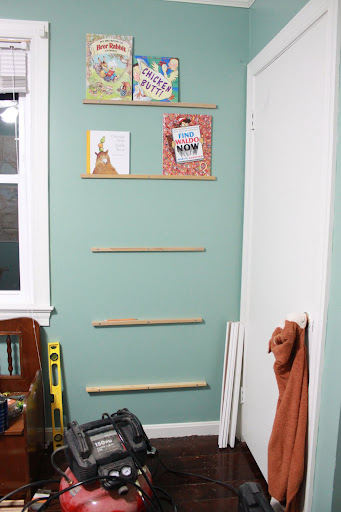
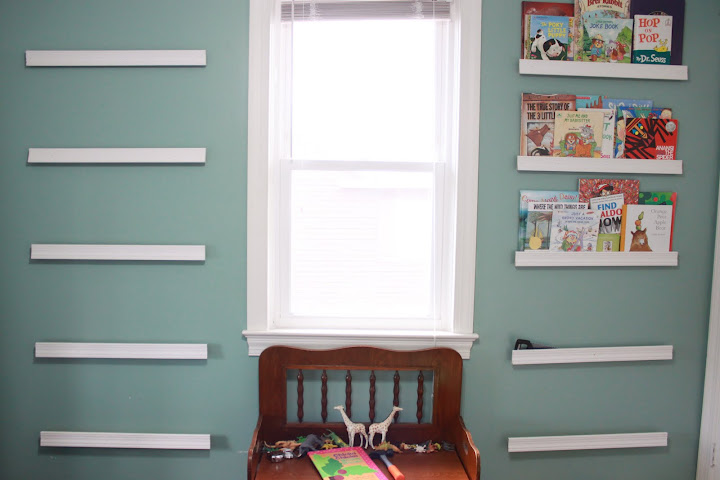
You can see that my scrap "shelves" aren't all exactly the same length. As I was working with what I had, I found pieces of wood between 26 and 28 inches. Then I cut my free 7 foot molding pieces into thirds.

That way, all of the molding on the fronts of the shelves was even and I didn't have to worry about my scrap shelves.

I held the molding in front of the shelves and used the small nail gun in the center to tack it in place. Then I made sure that the molding was level, adjusted where needed, and added 3-4 other nails along the molding to firmly secure it to the front of the shelf.
As I went along and nailed the molding to the fronts of each of the shelves, I also made sure that they were all level with each other vertically before nailing them into place.

I'm always a little nervous when I level things in my house because, well, my house isn't level. Not even a tiny bit. Marbles will always roll from one side of the room to the other. So, sometimes, even though everything I do is level... it just doesn't look level. Because my house is old and the window & door casings and the floors and ceilings are mostly crooked. Fortunately, this wall seems to be relatively level because the shelves turned out fine.

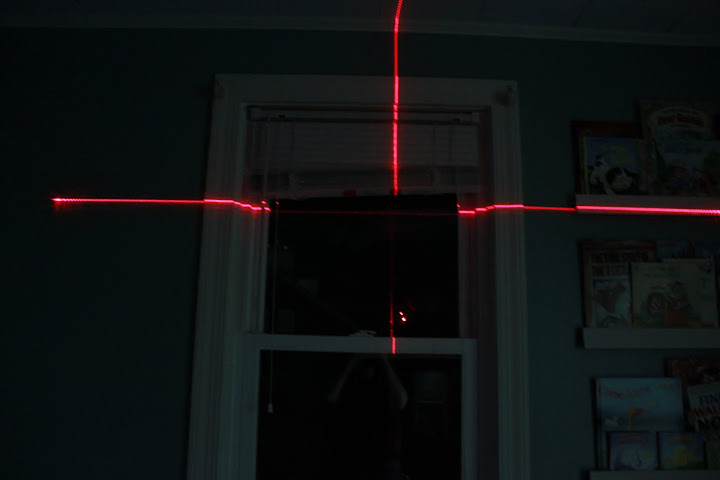
Next, to make sure that my shelves were even with each other on both sides of the window, I used a laser level. Best toy tool ever.
At this point, it was Joseph's bedtime, so I marked where the shelves would be and called it a night. The next morning, I was determined to finish and forever remove visions of smushed toddlers from my head. So, I got out my tools and Joseph's tools and we we went to town installing shelves. Here he is "screwing" the shelves in place for his Mommy.
Since I was becoming an expert at shelf installation, the second column of shelving came together much faster. I might actually paint them eventually so that they are completely white (shelves, cut edges, and all)... but I'm in no big hurry as I'm pregnant and they look just fine. Huzzah for pre-primed molding!
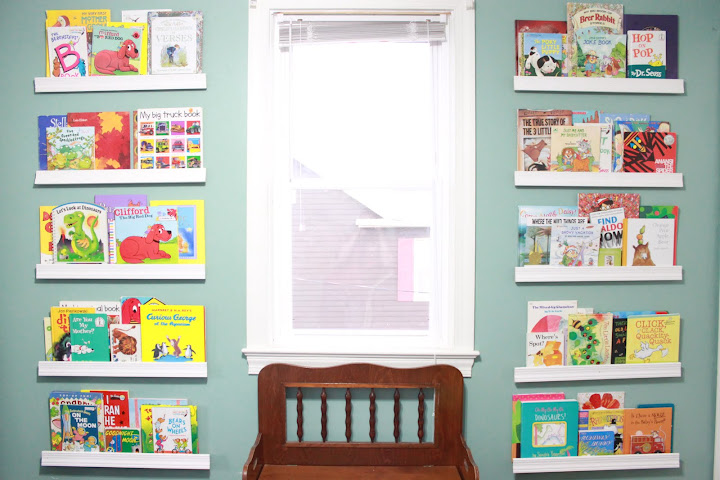
I had Joseph hand me books and giddily began filling the shelves. Boy, what a huge difference! It's SO much cuter! And all for free! Even most of the books were purchased for 25 cents at the Goodwill Outlet in Richmond. Heck! Even the toy chest/bench was a hand-me-down from my Mother-in-Law. It used to be her kids' toy chest. It's a wall of thriftiness!
I collected MY congratulatory kiss from Joseph and we were off to the park. Yippy!

I am so happy with how these shelves came together. Only about 3/4 of Joseph's books fit on them, but that's okay because I want to keep a stash of books in the living room bookcases downstairs since that's where we spend much of our day.
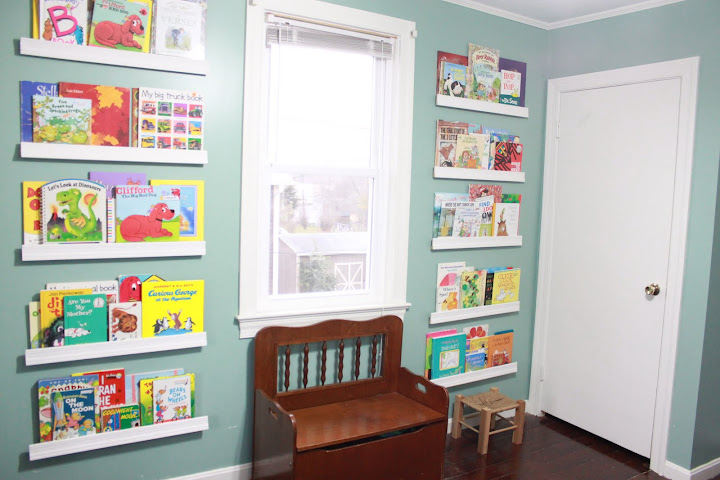
The only thing I would change if I were to build them again is the width of the upper shelves. I wanted them to be narrow because I needed to be able to open the closet door without mishap, but sometimes one of the books will flop forward a bit. I've fixed this problem by making sure there are enough books on the upper shelves to hold each other upright since they are 1/2-3/4 inch thick. Really, I don't care because I was just working with what I had. It isn't a problem with the bottom two shelves in each column because they were made with scrap 1x2s and are around 1.5 inches wide. So, if I were to do this again, I'd probably use only 1x2s or something a little wider for my shelves.
Overall, though, I consider this project a success. I never left my house once, spent no money, and made it up as I went... So, not too shabby! And they are a big hit with Joseph.

Now, I just have to remember to rotate the books every once and again. :)
If you have any questions regarding the building of the forward facing shelves, just let me know. Really, if I could figure it out, you know it wasn't hard!
*****
A Note from Joseph the Studly Tool-Wielding Builder:
Don't listen to her! She has no idea what she's talking about! I'm the expert builder! I have all the cool tools! Those shelves are all my doing!! She's a fraud! A sham!

*****
Yeah, yeah. No cookies for you mister.
I can't wait until I finish the wall opposite Joseph's forward facing shelves so that I can share it with you. All I have to say is that some free molding may have been involved... ;)
This looks so cool! Love that you can see all the books now! It's like practical and useful art. Hurray!
ReplyDeleteI LOVE those shelves, and I'm continually impressed by your ability to create awesomeness out of nothingness. :)
ReplyDeleteAlso impressed by Joseph's branching out in the word department. Soon he'll be chattering our ears off. :)