
So, when I realized that this week's Dare to DIY challenge over at Newlywoodwards is to give homemade Christmas gifts, I thought, DUDE! I'm all over this!

Are you excited??
Good, because I didn't make the dress yet... In fact, I still have to find a pattern. Sorry! I have a feeling that my sister might get the gown for her birthday on May 3rd. Which also happens to be my due date. So, we'll see... Who knows, maybe I can drum up some crazy marathon sewing enthusiasm before Christmas?
Anyways, onto the homemade gifts that I did manage to throw together this morning thanks to a little Kick in the Butt Kimspiration. :)
If you follow me at all on Pinterest, you've probably noticed that I pin quite a lot of children's activities. While Joseph and I have done several of these activities, we haven't come anywhere near to putting a dent in my "Kid Stuff" Board.

Since we are expecting a baby in May, I'd kind of like to have a lots of Toddlerific Activities ready-made by then. Activities that will keep Joseph plenty busy throughout the days when I am Zombie Mommy. So, I went through my "Kid Stuff" Board on Pinterest and marked a bunch of DIY kid's activities/toys that I want to create for the little guy for Christmas. It's a two-for-one kind of thing. He gets lots and lots of crazy awesome homemade Christmas presents and I get a huge supply of fun activities to do with Joseph.
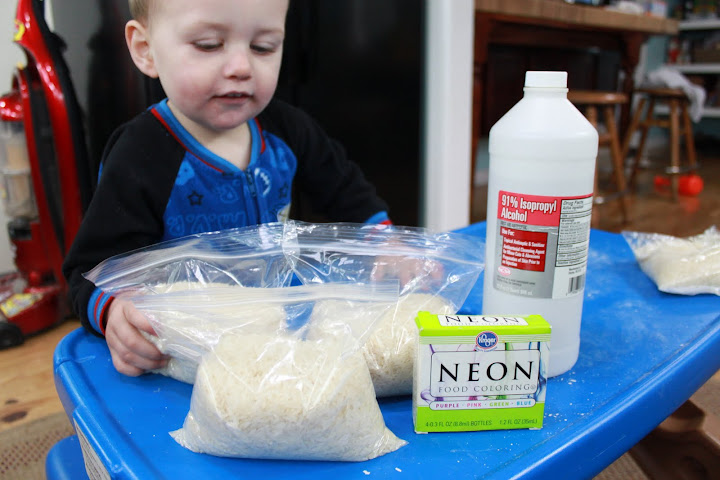
So, I started my morning off with this pin:

Rainbow rice!! It's like sand, only way cooler! This project was super easy and only took about 20 minutes to complete. I grabbed 5 sandwich baggies and measured 2 cups of rice into each one. Then I poured in 1 tablespoon of food coloring (essentially, the entire food coloring squirt bottle) and 1.5 tablespoons of rubbing alcohol into each bag. I used all of my neon food coloring and most of a bottle of yellow food coloring from the my regular food coloring box.
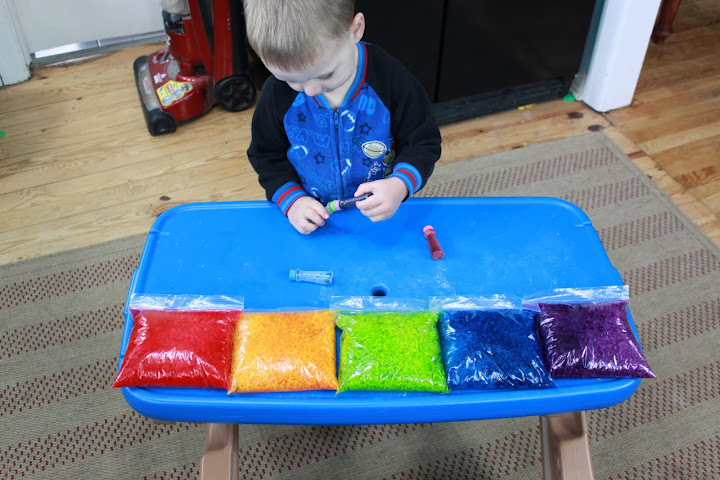
Then I handed the bags to Joseph to SHAKE SHAKE SHAKE! To encourage shaking, I put on the song "I like to move it, move it!" and Joseph and I danced around shaking our bags. I don't really know why, but every little kid I've ever met loves to dance to that song.

Greatest kid dancing song ever. Trust me. I used to work in a day care center.
After our dance-athon, Joseph and I had 5 bags of very colorful rice.
And, yes, I realize that I just had Joseph help me create his own Christmas present, but, dudes, he's like one and a half. He doesn't really understand that he's getting Christmas presents yet. Besides, call me crazy, but I like to reserve nap time for such trivial household pursuits as laundry and dishes and vacuuming.
I dumped the rice out onto cookie sheets covered in tin foil.

Then, I spread the rice out with a butter knife so that it could dry.

Then, I showed Joseph the rice and he started giggling and pointing to the trays. I told him what color each tray of rice was and he mostly ignored me. Just a normal Monday morning.

Since my kitchen started to smell like rubbing alcohol at this point, I moved the pans of rainbow rice outside to dry in the sunshine.

The rice turned out really, really well. It's completely dried and it retained all of its color. It looks a lot darker than the rainbow rice I found on Pinterest, but I think that's because that rice was made with liquid water colors instead of food coloring.

After the successful completion of the rice project, I was all pumped up, so I browsed through my "Kid Stuff" board on Pinterest again and picked out this easy peasy little activity:

I went and grabbed an old pair of jeans that will never fit me ever again... unless my pelvis has any plans to shrink in size after the second kid... which I seriously doubt...

I cut the jean legs off and then cut them along one seam.
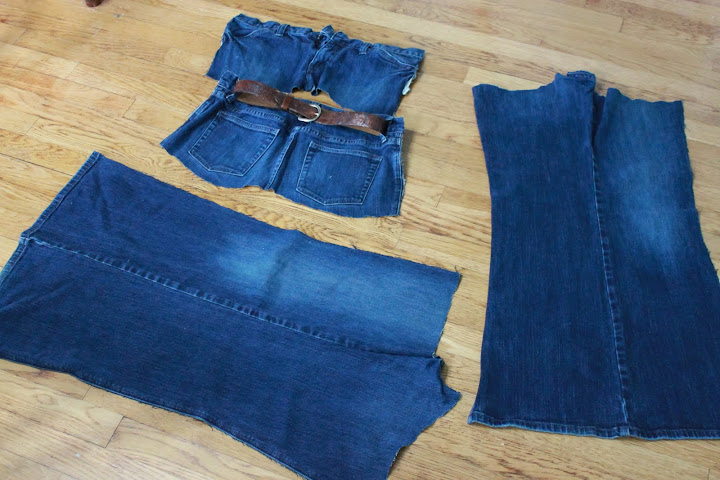
Then I cut the pants legs apart into road pieces.
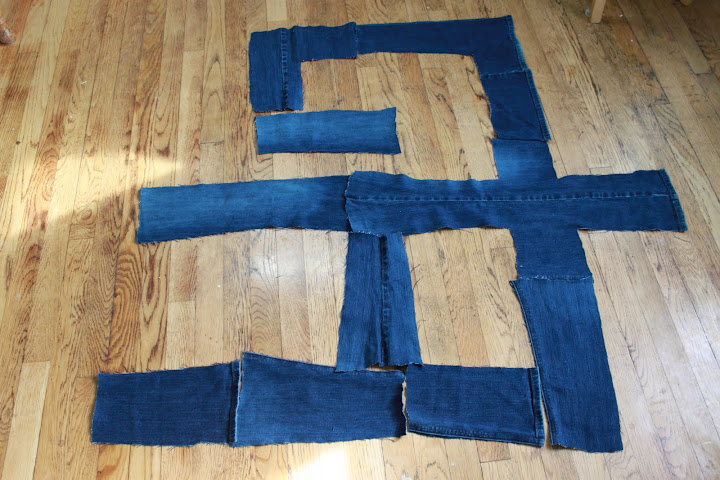
Then I used some yellow acrylic paint to give the roads a dividing line.

Super easy 30 minutes well spent. All I have left to do is put tacky glue along the edges to keep them from fraying and attach velcro to each end of the road pieces. Then I can roll them all up and place them in a ziploc bag with a few hot wheels cars. Voila! Instant portable roadway that's great for traveling with little boys. Winning.
And, since I had the top pieces of the jeans left over, I decided to tackle this pin:

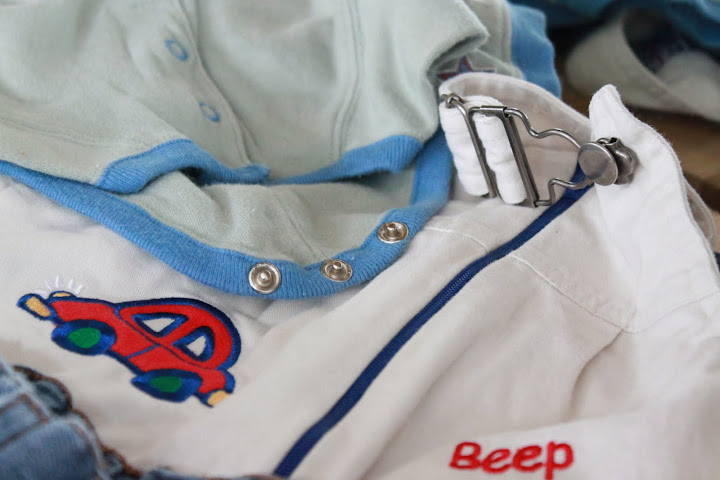
This is a terrific (Montessori-esque) activity for toddlers. It helps them practice their fine motor skills while simultaneously teaching them how to fasten their own clothing. This could potentially lead to naked children running around your house, but, hey, they have to learn sometime.

I went through my closet and Joseph's dresser and gathered old clothes. I even found some old belts and a broken old suitcase with tons of clasps.

I focused on finding clothes with big buttons, little buttons, snaps, overall clasps, velcro, zippers, buckles, latches, and hooks.
I've started to cut the clothing up, but I have to figure out whether or not I'm going to put them on frames or somehow incorporate them into a busy book. Either way, I promise not to cut up my younger brother's old belt. Do you hear that, mom?? It's for belt loops only!

I still want to find some plastic buckles (such as the kind attached to shopping carts) and an article of clothing that requires lacing. Other than those two, I think I have a decent collection of clothing clasps for Joseph to practice on. That's about as far as I got before Joseph and I had to leave the house for a play date with friends.
However, thanks to Kim, I'm super motivated to complete even more of my kids activities for Joseph. My plan is to work on creating one pin a day until Christmas. Tomorrow, I'm going to pick up a pack of felt and some beads so that I can start creating a quiet book such as this:


A busy bag is just a plastic baggie filled with a single activity meant to entertain/teach a toddler. I hope to have a whole bin of busy bags for Joseph by the time I have this baby.

I might also have to venture out into the wood shop and start DIYing some fantastic wooden presents. For example, these would be super easy to make:

And, though a little more involved, I've been wanting to make one of these for the longest time now:

It might not happen before Christmas, but it is so going to happen.
Thank you, Kim. You've awoken the crazy woman in me. ;)
That rice is so cute! I love it! I never would have thought of that. And I love that you used reused jeans for those roadways. Those are so cool! You are so clever.
ReplyDeleteYour little guy is so sweet - and congrats on #2 on the way! :)
ReplyDeleteThe rice is so colorful & cool - he is gonna love playing in it. Love all of your other ideas, too - I can't wait until mine is old enough to use some of them!
Dear Caroline,
ReplyDeleteYou rock.
Also, I now feel like I should make something everyday for Colton. Joseph is going to have the coolest house in town.
I'm pretty sure *I* would enjoy playing with that rice! :)
ReplyDeleteQuestion: when the rice gets wet, does it run/stain/smear? My in-laws are getting my daughter a water/sand table and i was thinking of doing it with rice. however, i don't want a huge mess if the colors start to run...
ReplyDelete